With the release of FileMaker 19, Claris International, Inc. introduced the ability to create add-ons, allowing developers to package a set of features that can be distributed to other FileMaker solutions. While installing custom add-ons currently must be started outside of FileMaker, add-ons can currently be created in FileMaker Pro using the preview script step Save a Copy as Add-on Package. As with all preview software, this feature is subject to change.
Let’s take a look at how to create your own add-on.
A Few Things To Note Before Diving In
Before we begin making our add-on, please note
The file we use to create the add-on needs to have a unique file ID. Creating a new file generates a unique file ID, so we recommend creating a new file for each new add-on.
The name of the file will be the name of the add-on. You can change the name afterwards, but it’s simpler to have the file be the correct add-on name.
Add-ons will ignore security features but will retain any sample data in the file.
Once the add-on is installed in the application it will be available to everyone using the app.
Creating An Add-On File
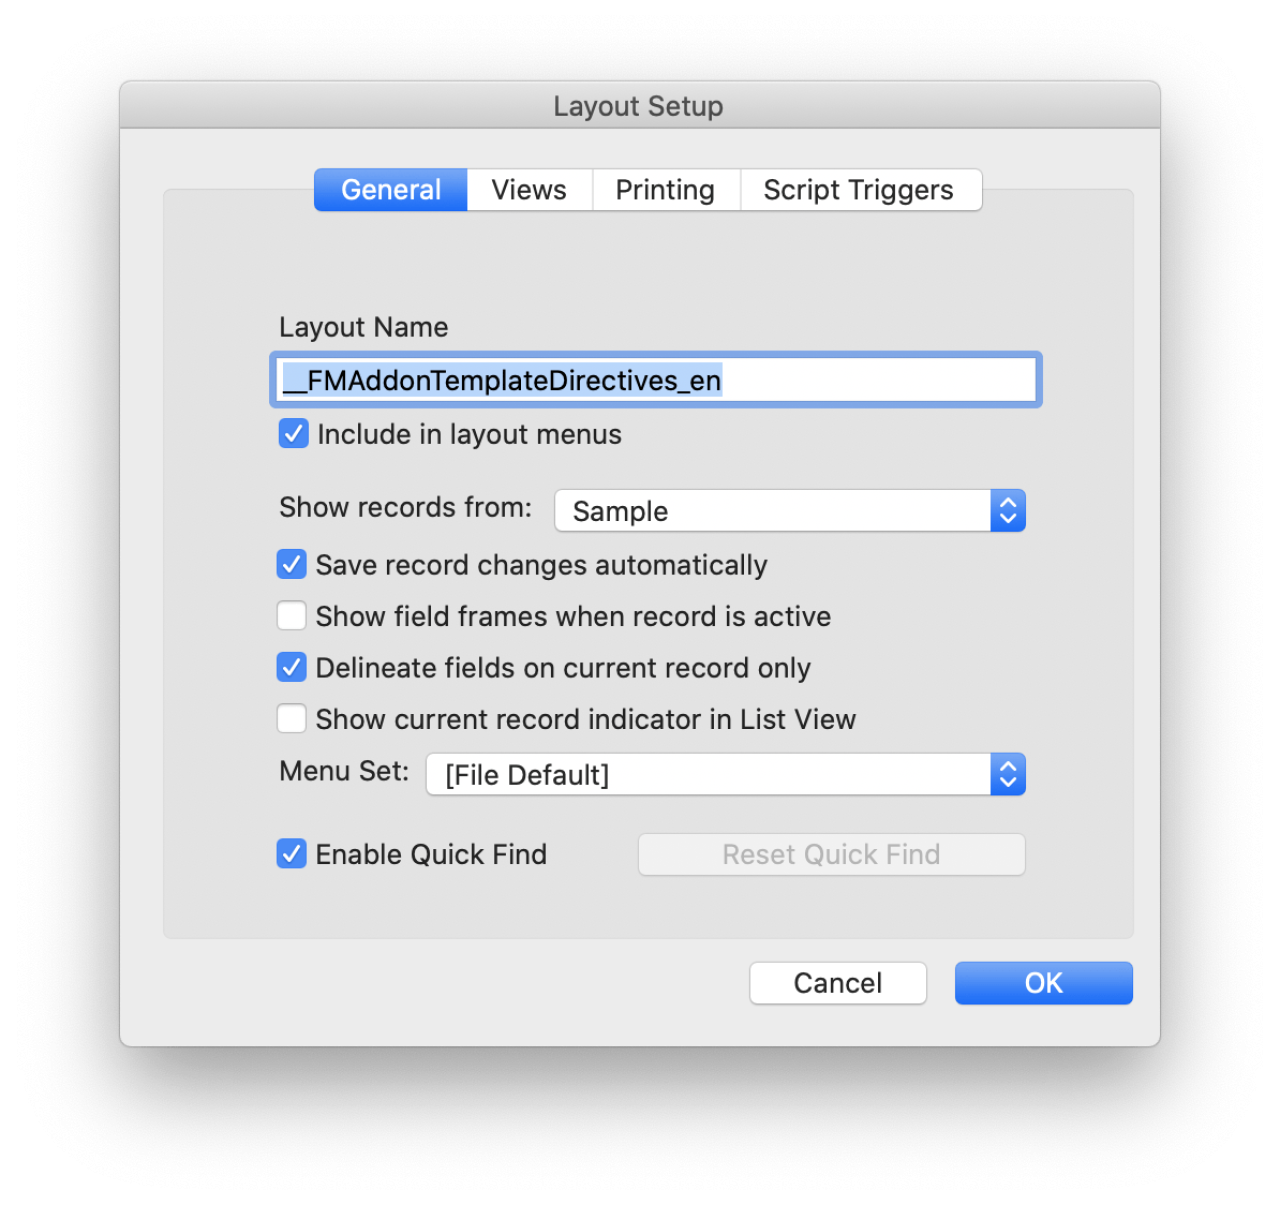
As stated above, we recommend creating a new FileMaker file to ensure you have a unique file ID and to property name the add-on. Once you have created and named your file create a layout based on a table occurrence that you want to import into the new file. Name the layout __FMAddonTemplateDirectives_en (“en” can be replaced with any ISO 639.1 language code). The layout will act as place to create the add-on content, but the layout itself will not be part of the add-on.
Adding Drag And Drop Content
Almost everything in the FileMaker file will be included in the add-on when the package is created, including all scripts, layouts, tables, table occurrences, etc. in the file, meaning that you don’t need to put everything on the __FMAddonTemplateDirectives_en layout. But there are special steps to tell FileMaker what layout objects you want added to the layout that a developer drag and drops your add-on onto.
On the __FMAddonTemplateDirectives_en layout, add all layout objects that you want created when the add-on is drag and dropped. Once you have all of the layout objects positioned, anchored, and styled properly group them all in one single group. This should be the only group you make on this layout. Do not name the group. The add-on will include any objects in this group when the add-on is dragged onto the layout. Anything outside of the group will NOT be included in the add-on. (Creating add-ons that automatically create a relationship to the target file’s current table require more advanced setup.)
Packaging The Add-On
Now that the add-on is ready to be packaged for deployment, we need to run the “Save a Copy as Add-on Package” script step with the following settings and parameter

Pass in the window name of the add-on window.
Replace UUIDs: On. The UUID is what FileMaker uses to show unique add-ons in the Add-on Install tab. If two add-ons have the same UUID, only one will be shown. If you want to have different versions of this same add-on, set this step to On
Running this script will create the add-on. It will include all valid parts of this file into the package and save it in the AddonModules folder, which will open up.
Distribution
To make this add-on available for FileMaker for your development, simply quit FileMaker. Then start it back up. This add-on will be available in the Add-on Tab of layout mode. To make this add-on available for another developer, simply go to the AddonModules folder, zip your custom add-on folder, send the zip to them, and ask them to place the unzipped folder in the AddonModules folder on their computer. The AddonModules folder is at:
Mac: /Users/username/Library/Application Support/FileMaker/Extensions/AddonModules
PC: Users\username\AppData\Local\FileMaker\Extensions\AddonModules
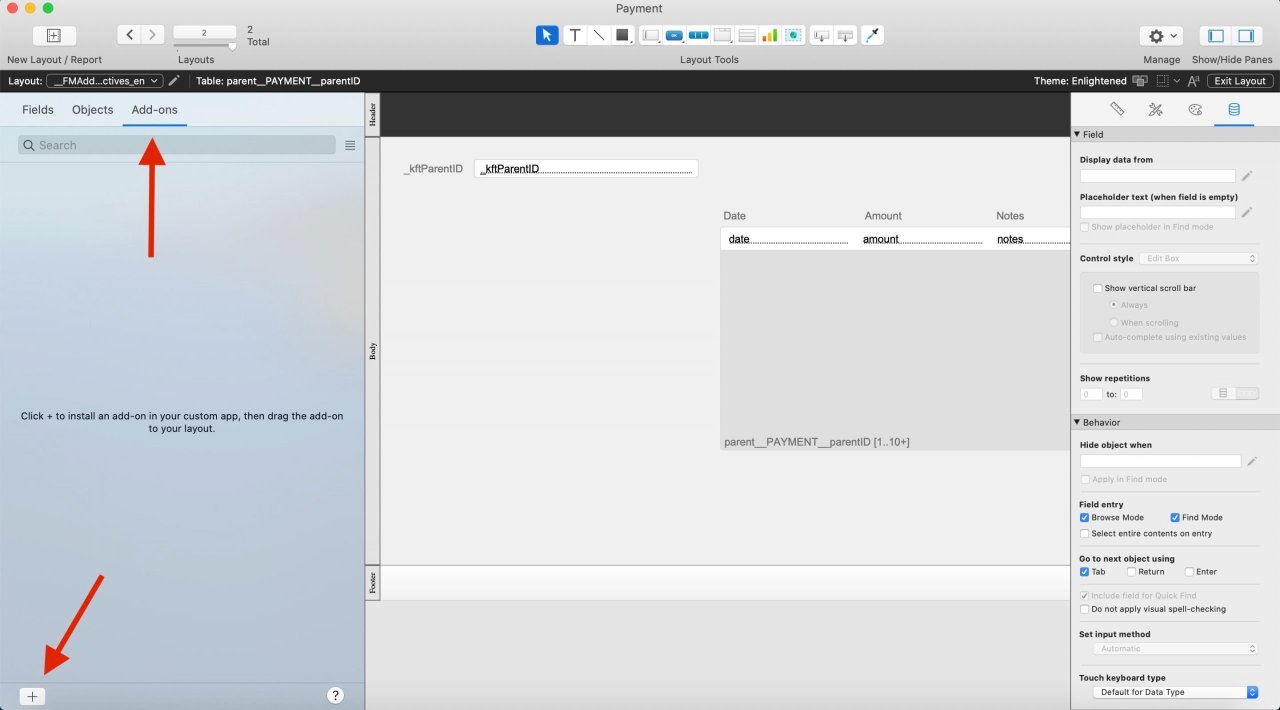
Installing Add-Ons
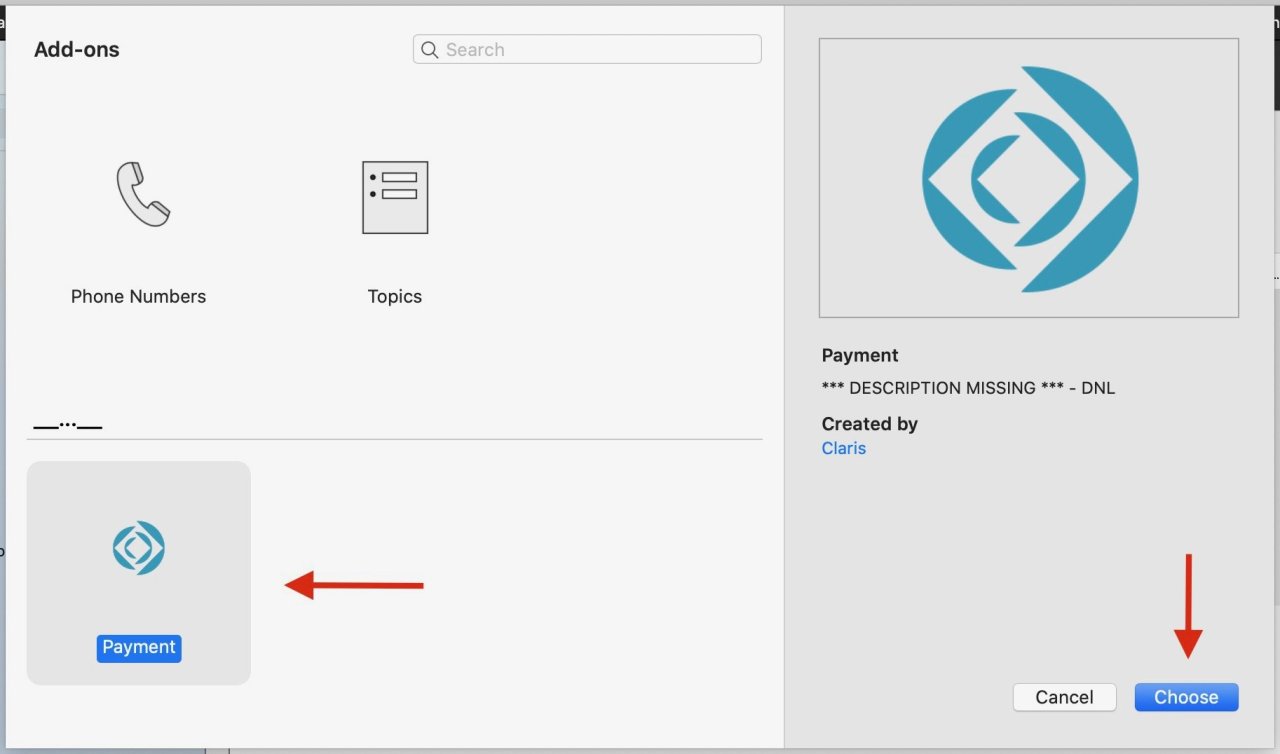
To install an add-on in your FileMaker solution ensure you have the folder of your custom add-on in your AddonModules folder and that you’ve restarted FileMaker Pro after adding the folder. Next, navigate to the layout in your FileMaker solution in which you want the add-on to appear. Enter layout mode and expand the left menu layout object panel. Click on the “add-ons” tab. Click +, select an add-on, and click Choose. The add-on will appear in the add-ons list and is available to place on any layout. Simply drag the add-on from the list onto the layout.
Conclusion
Using add-ons makes installing features in your custom FileMaker solution faster and easier than ever before. You can install pre-made add-ons, or create your own, saving time and effort. Check out our popular Google Calendar Integration demo file that we packaged as an add-on for this article’s sample file, and contact us if you would like help creating your own add-on.
Did you know we are an authorized reseller for Claris FileMaker Licensing?
Contact us to discuss upgrading your Claris FileMaker software.
Download the Google Calendar Integration Add-On File
Please complete the form below to download your FREE FileMaker file.