FileMaker provides an excellent suit of features to build invoicing solutions. These solutions can be great when they are used in FileMaker only. But, sometimes it's necessary to expand your applications to take payments and send invoices on the web. Stripe provides a suite of features that allow you to manage payments and invoices online conveniently. Integrating FileMaker with Stripe using REST API allows us to create powerful online invoicing solutions for our applications. Let's dive into the fundamentals of how to set up a FileMaker integration with Stripe for invoicing.
Stripe Account Creation & Setup
In order to integrate FileMaker with Stripe, the first thing we'll need to do is to create a free Stripe account by using Stripe's registration page. Once you create your free account, you will automatically be put into "Test mode". However, note that you can continue to activate your account, which will allow you to perform transactions with real money. Just make sure you toggle the "Test mode" switch whenever you want to test.

Before we can continue with the FileMaker and Stripe integration, we'll need to do some setup. Keep in mind that Stripe is very flexible in terms of setup options. This is just one way you can set this up, but we'll briefly touch on other options later.
Products
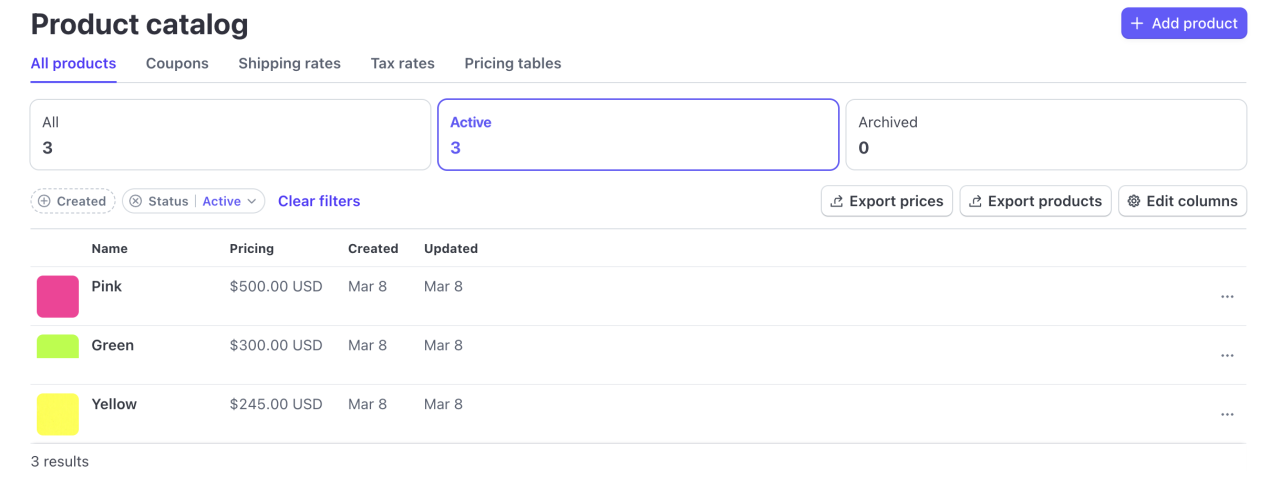
The first thing we'll set up is our products. We'll want to create the products we're going to be using in our test store. For this particular demonstration, we have set up a test store with colors as placeholders for products. Ideally, the product creation would be handled from FileMaker by integrating the Products API. However, for the sake of brevity, in this case we'll be doing the product creation manually.
Customers
The next step in our setup will be to create our customers. In our case, we created just one test customer, "Jason Smith". You can create multiple customers if desired, just be sure to perform the proper setup on FileMaker as well (more details on that later in this article). Once again, this can also be managed from FileMaker if you already have an existing customer base using the Customers API. We'll be doing this manually for this article, but we'll touch on how to do this briefly.

FileMaker Application
For the purpose of this article, we've created an accompanying file that you can download and follow. The file is a simple application that lets us create orders for our products. We'll be able to select a customer for the order and then generate invoices using Stripe's REST API. There is some setup we'll need to do before we can continue with the solution.
Stripe API Key
First, we'll need to obtain the API key. Go to the "Home" page on your Stripe dashboard. You should see a link named "API keys for developers".

Clicking this will take you to the "Developers" screen. From there simply select the "API keys" option (likely already selected) and you'll want to copy the "Secret key".
Note: If you proceeded to activate your account make sure you are in "Test mode" before you copy the "secret key". Your key will change depending on which mode you are and it will determine whether you create test data or real data.
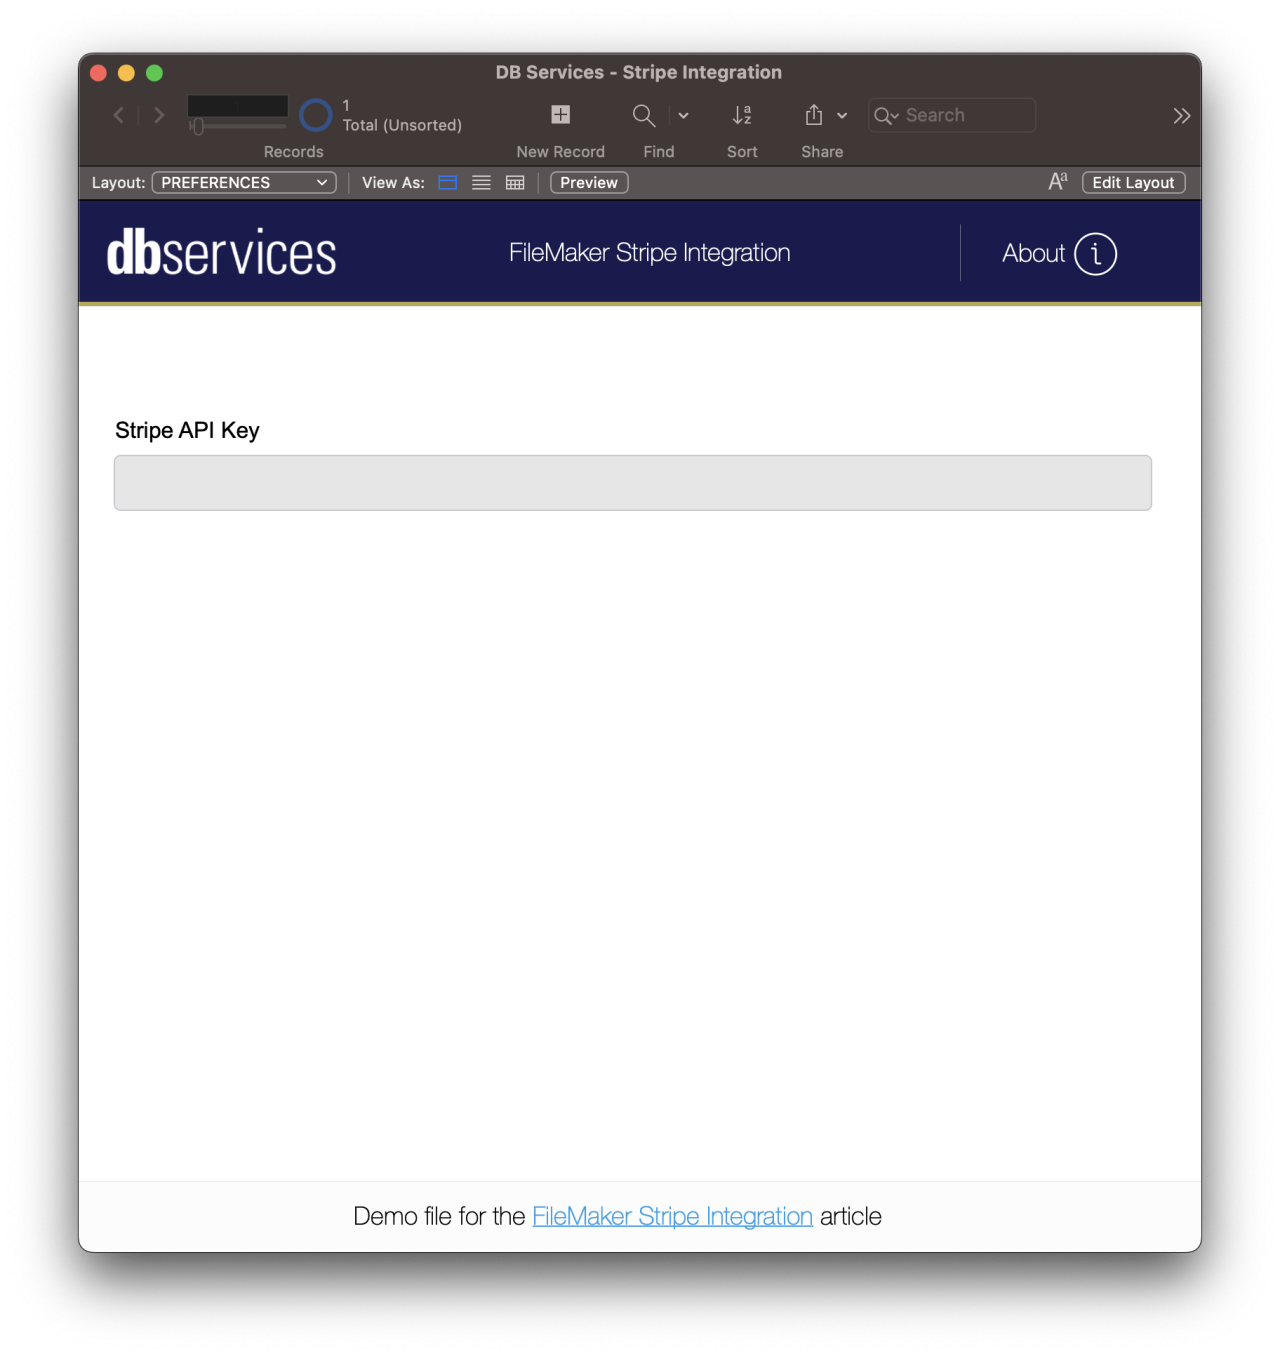
Once you have the key, paste it into the FileMaker file by using the layout dropdown and selecting the "PREFERENCES" layout. There you will find a field where you can enter the key.
Product
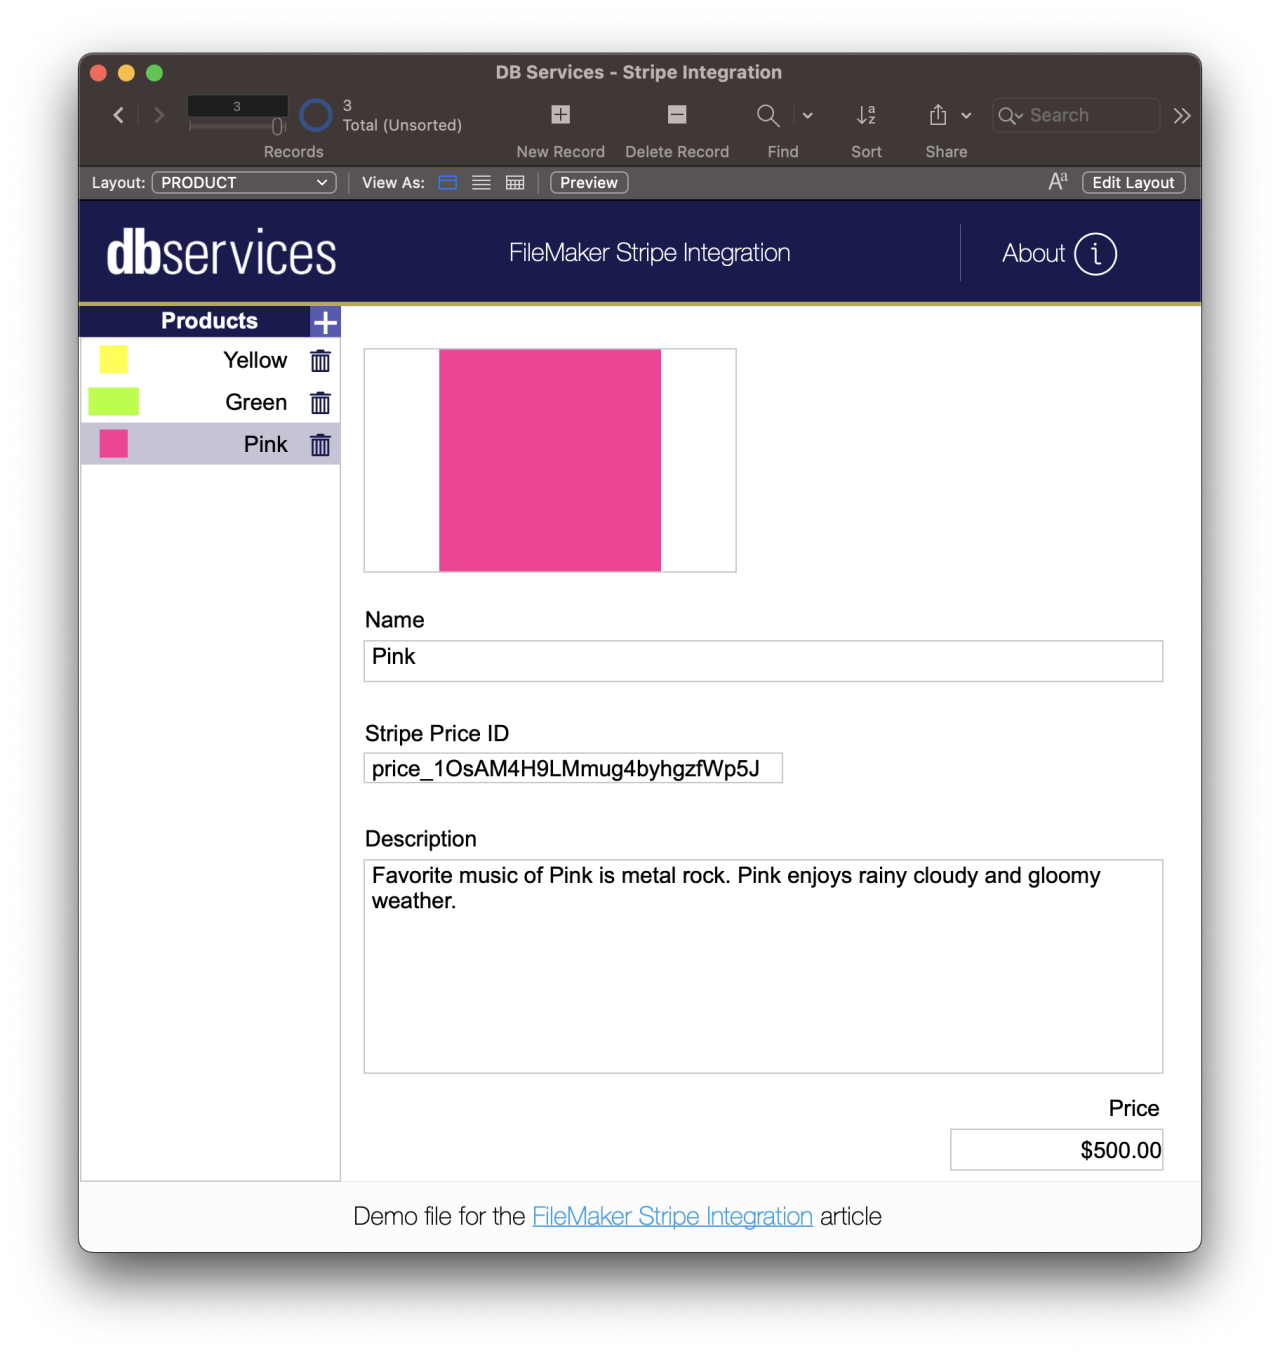
Next, we'll need to go to the "PRODUCT" table using the layout dropdown. From here, we can create the products for our store. You'll want the information here to match that of the products you set up in Stripe. It is very important that you copy the "price ID" for each of the products on Stripe to the field "Stripe Price ID" for each product.
To get the price ID of a Stripe product, simply select the product from the product catalog on the Stripe dashboard. Then, scroll down to the "Pricing" section and you will see a column labeled "API ID"

Copy this ID and paste it on the appropriate field on the product page in FileMaker.
Customers
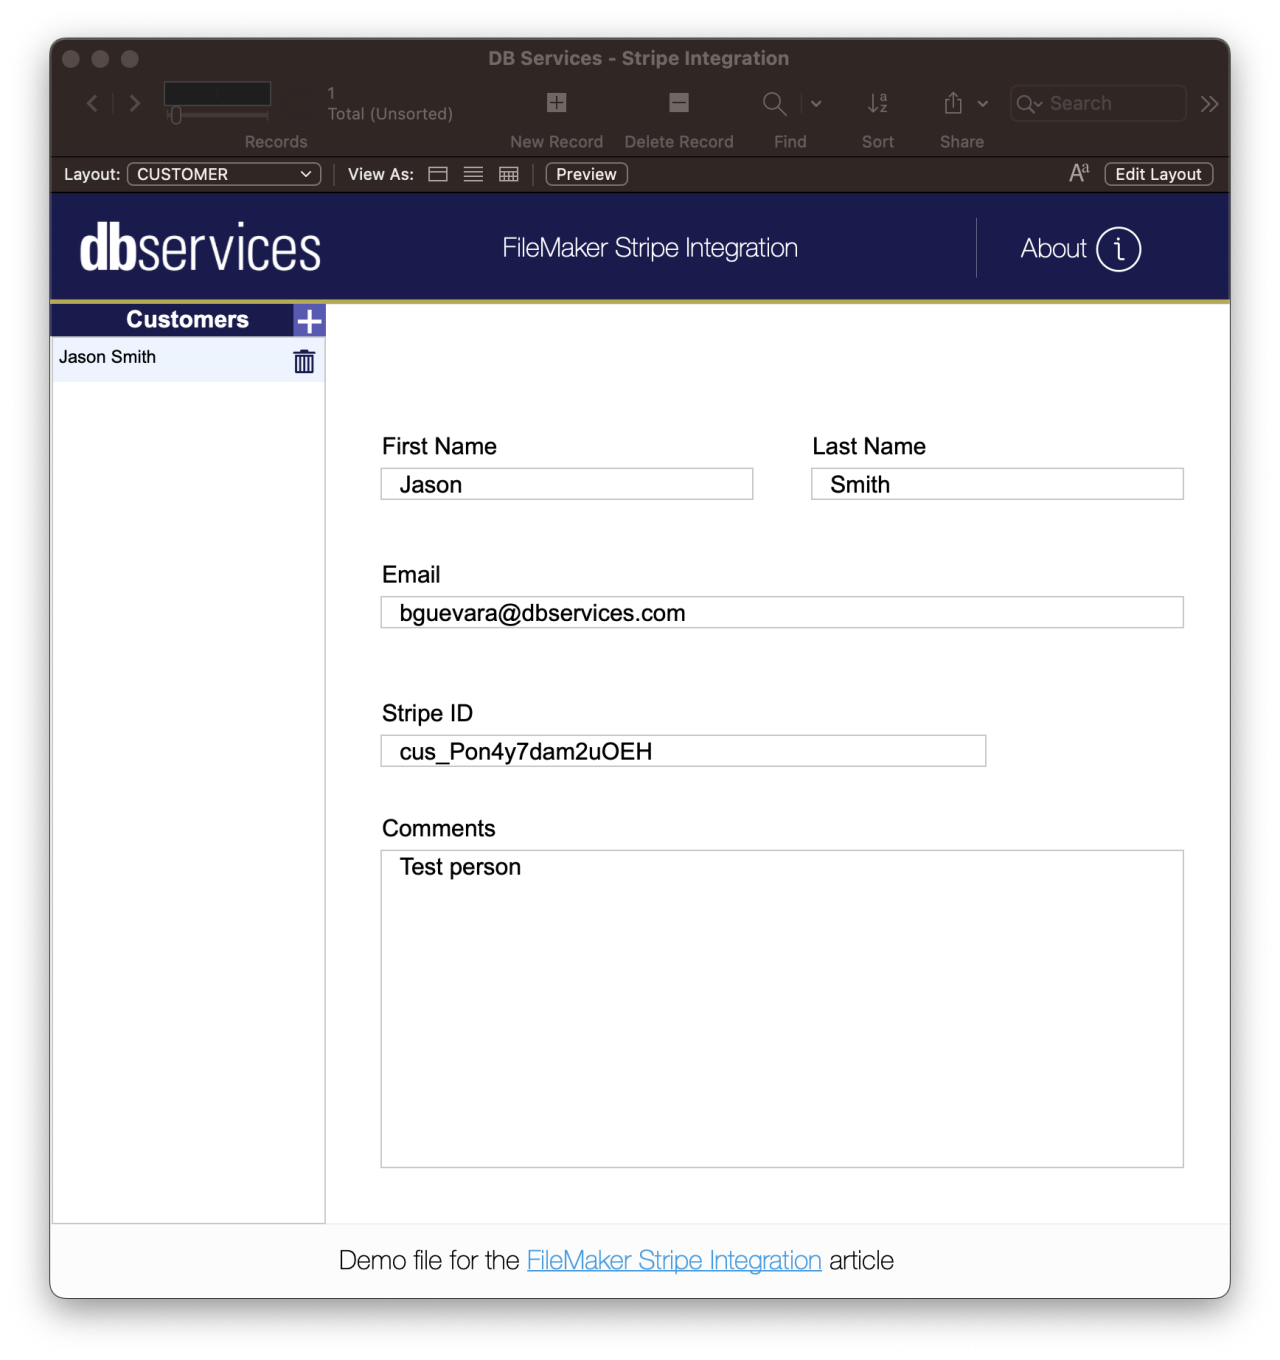
Next, we'll want to set up our customers in the FileMaker application. Using the layout dropdown again, go to the "CUSTOMER" layout. Create customers matching the information of the customers you created in Stripe. Like with the products, we'll need a specific ID from Stripe as well to link the Stripe customer to our FileMaker customer record.
To find the customer ID, simply go to the "Customers" section from your Stripe dashboard and click on the customer. From there look for the "Details" section on the far right and you will see a column of information including the customer ID.
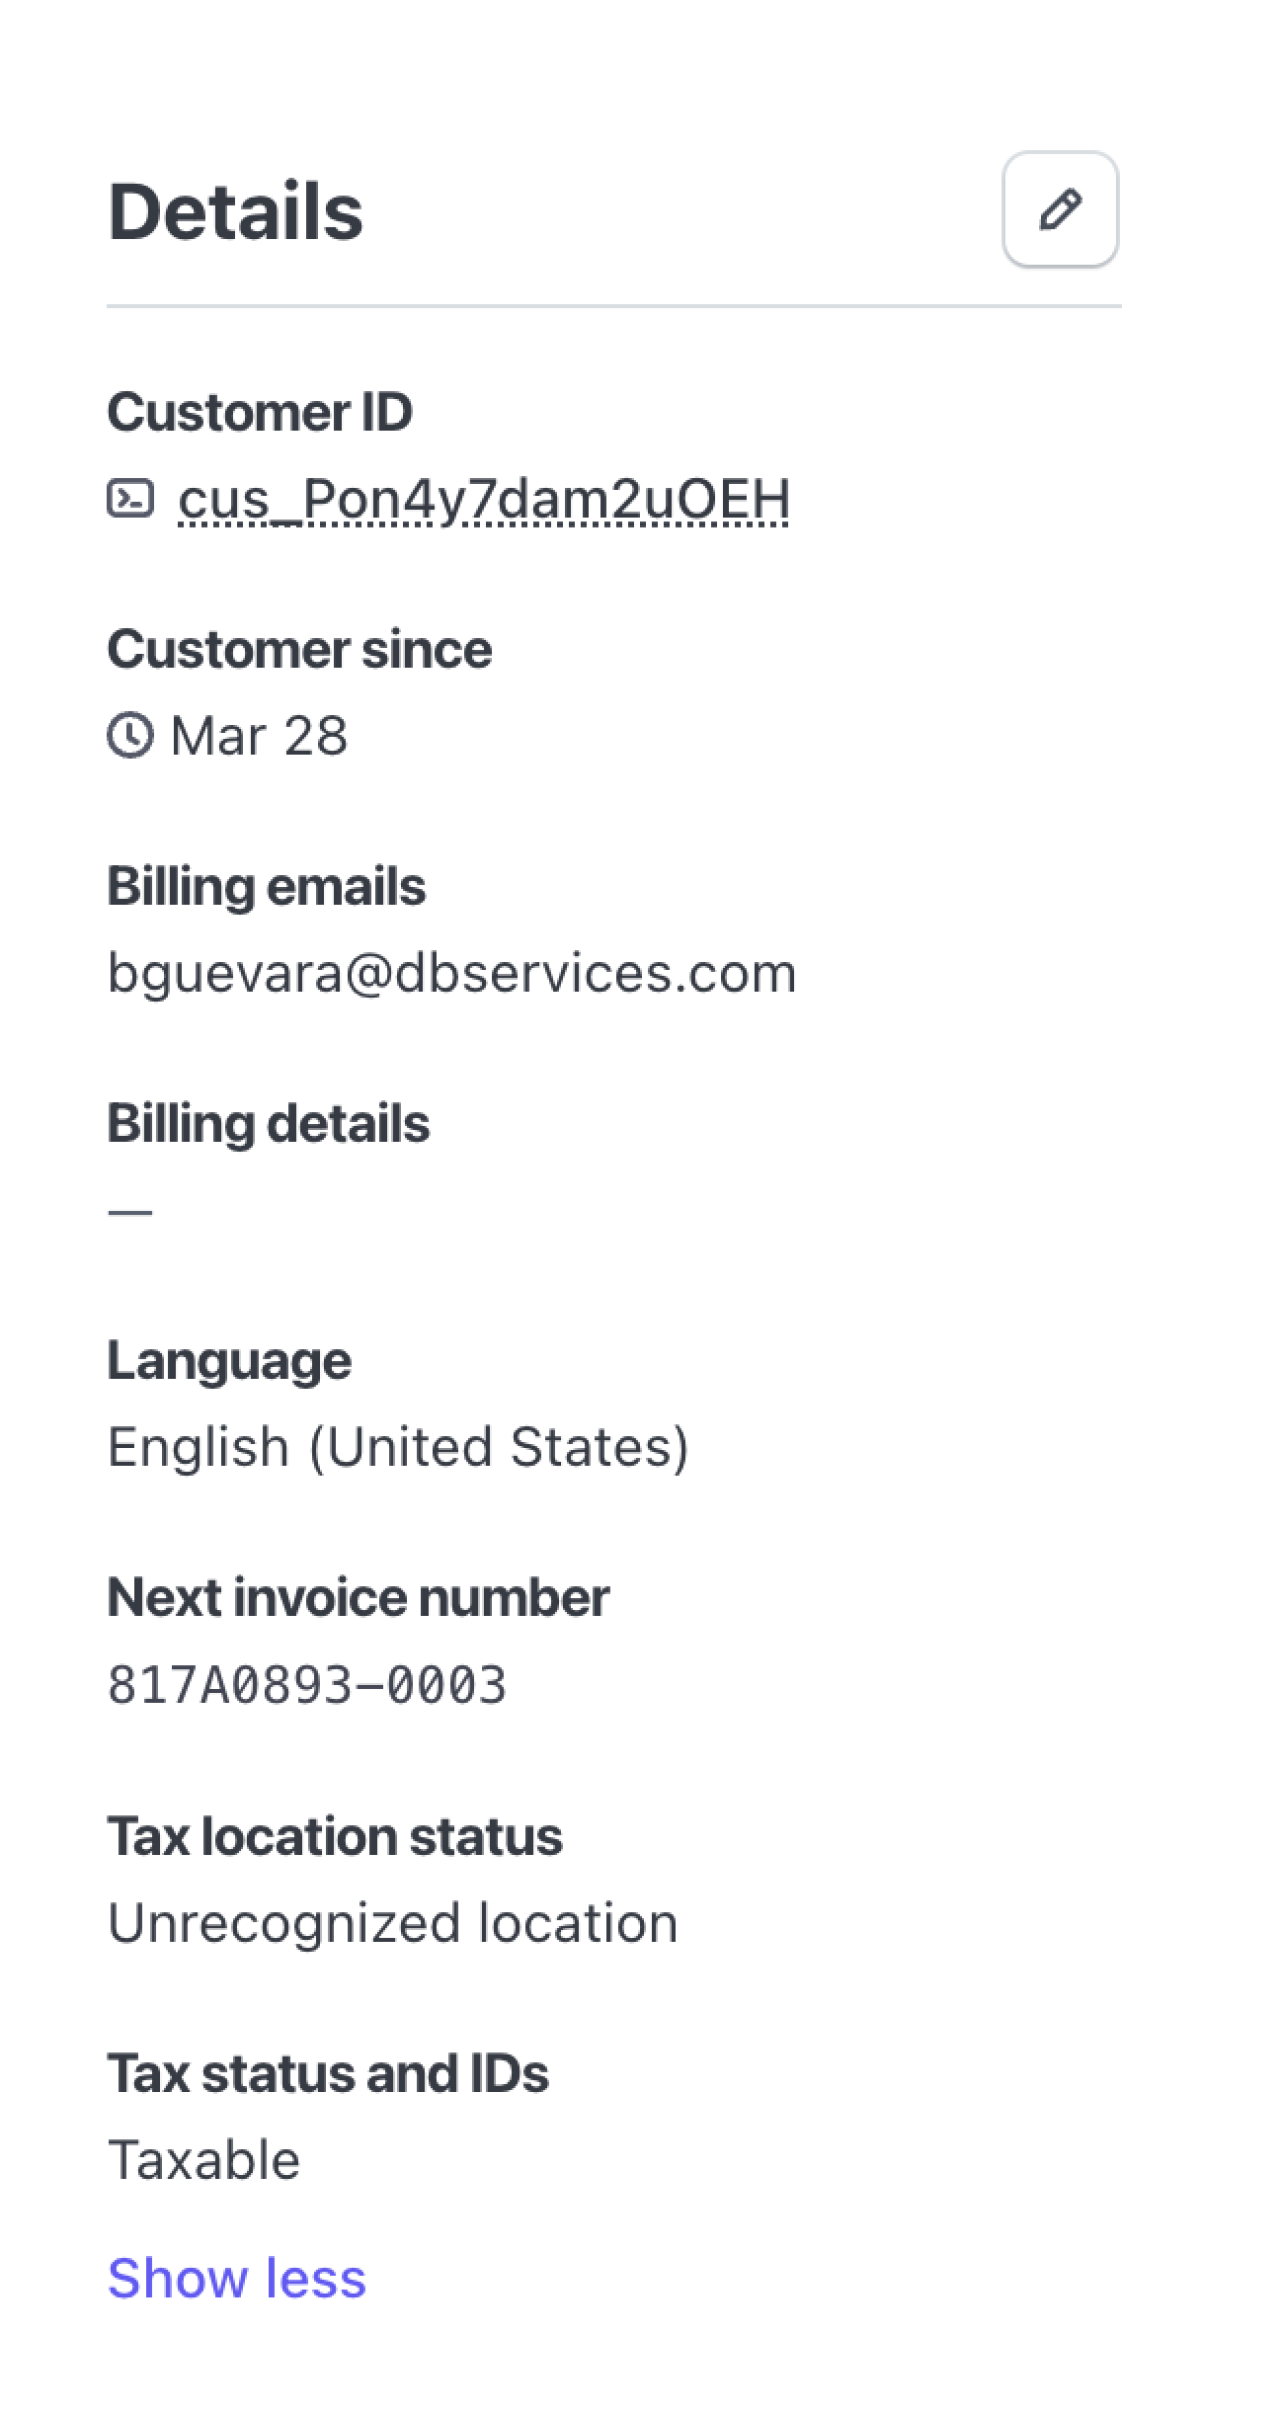
Once you have this key, paste it on the "Stripe ID" field in your FileMaker file. Copy and paste the ID of each of your Stripe customers onto the appropriate FileMaker customer records.
Orders
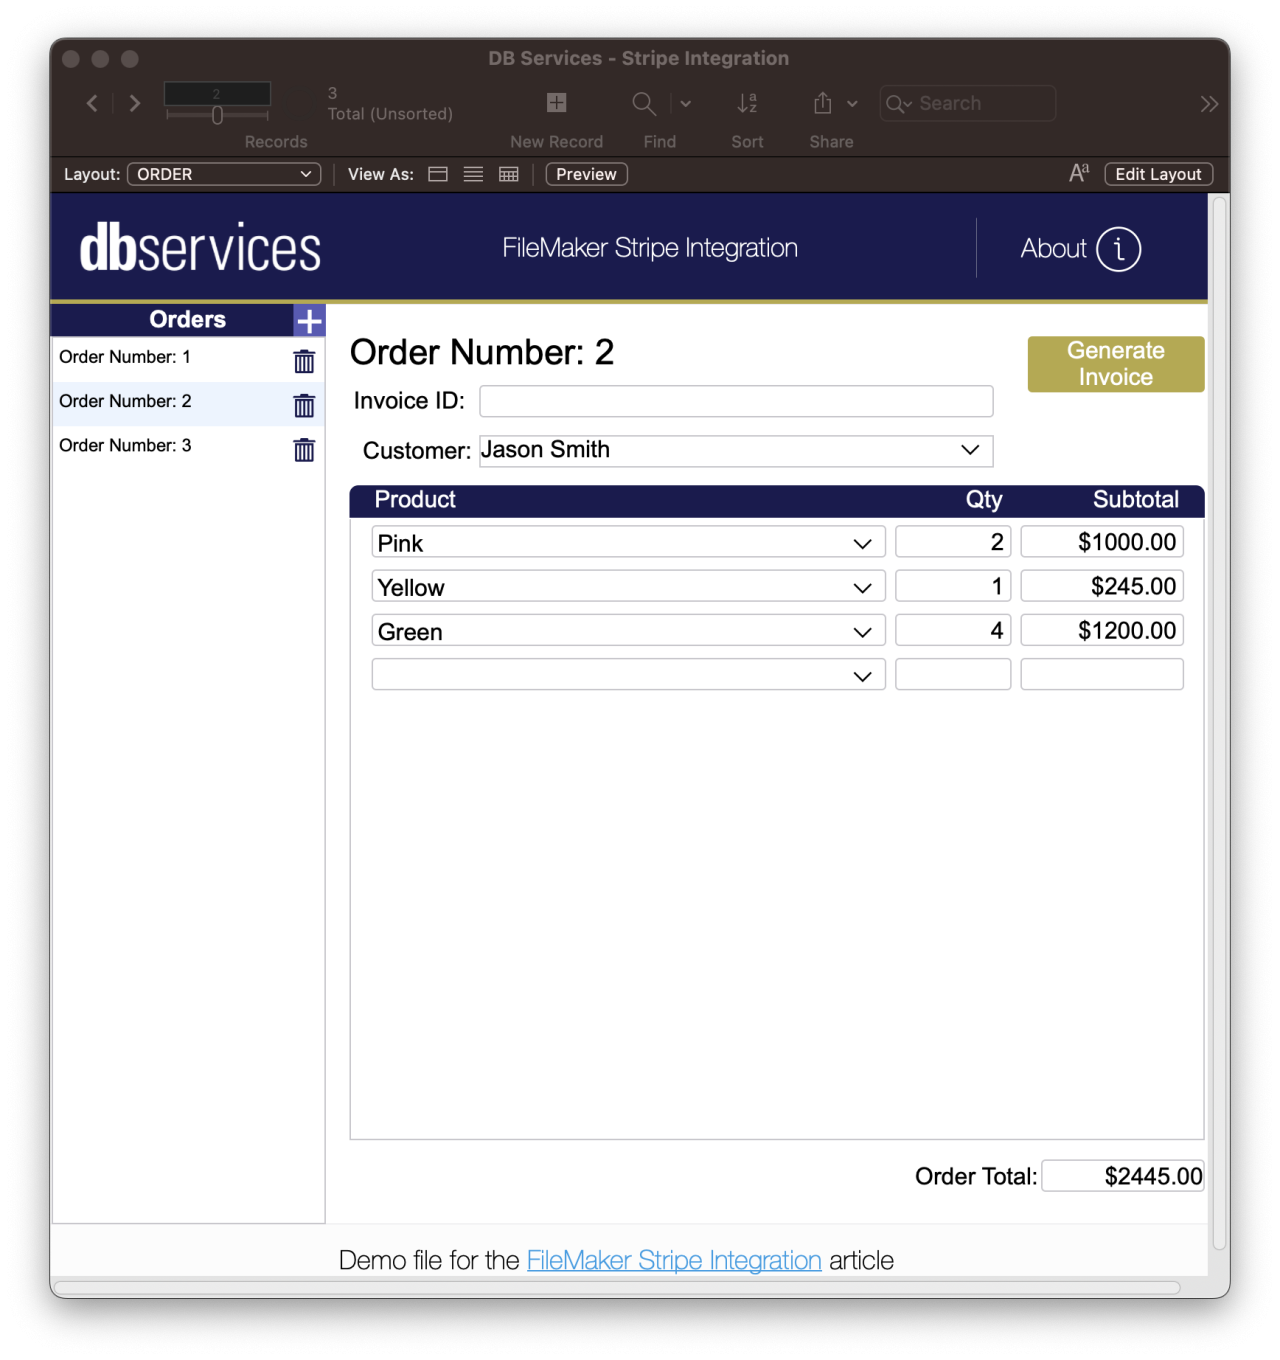
Now that we are done with the setup, we can use the information to create orders. To create orders, simply use the layout dropdown in FileMaker to select the layout "ORDER". Then use the "+" button to create your new orders.
Once the new order record is created, you can select the customer you want using the dropdown. Then select the products you want on the portal.
Once all of that has been completed, click the "Generate Invoice" button. This will create a new invoice in your Stripe dashboard that will have different behavior depending on which API key you are using. The behavior is as follows:
Test mode - Stripe will generate an invoice entry. You can see the invoice in your Stripe dashboard under Billing -> Invoices. From there you can click on the invoice and click "Send invoice" to email it to the customer.
Live - FileMaker will generate the invoice and email it to the appropriate customer.
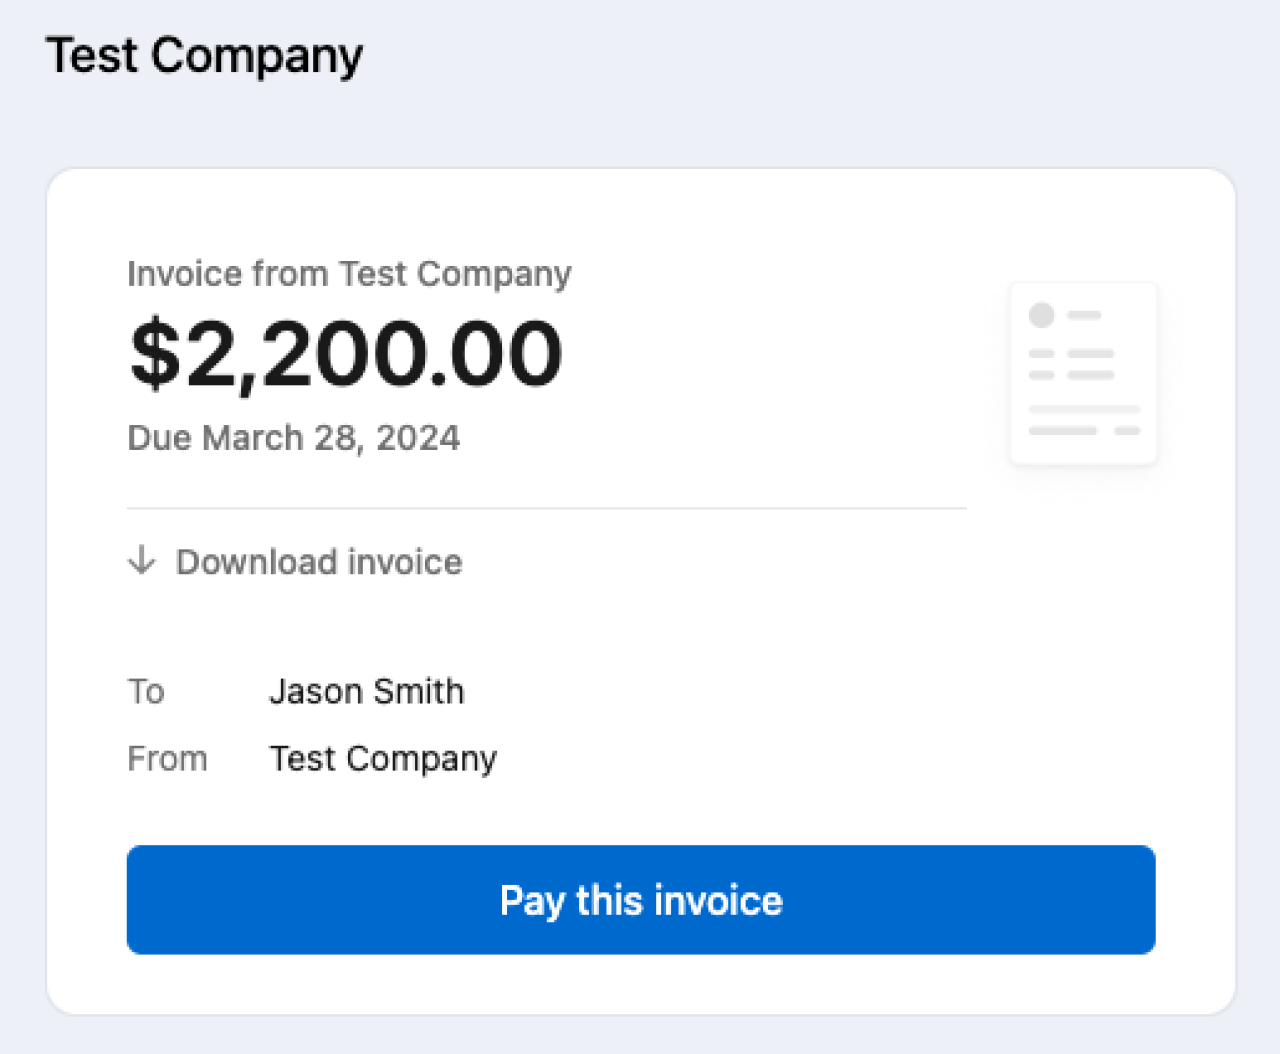
The email sent will contain the invoice and a link for the client to submit a payment no matter which option you choose.
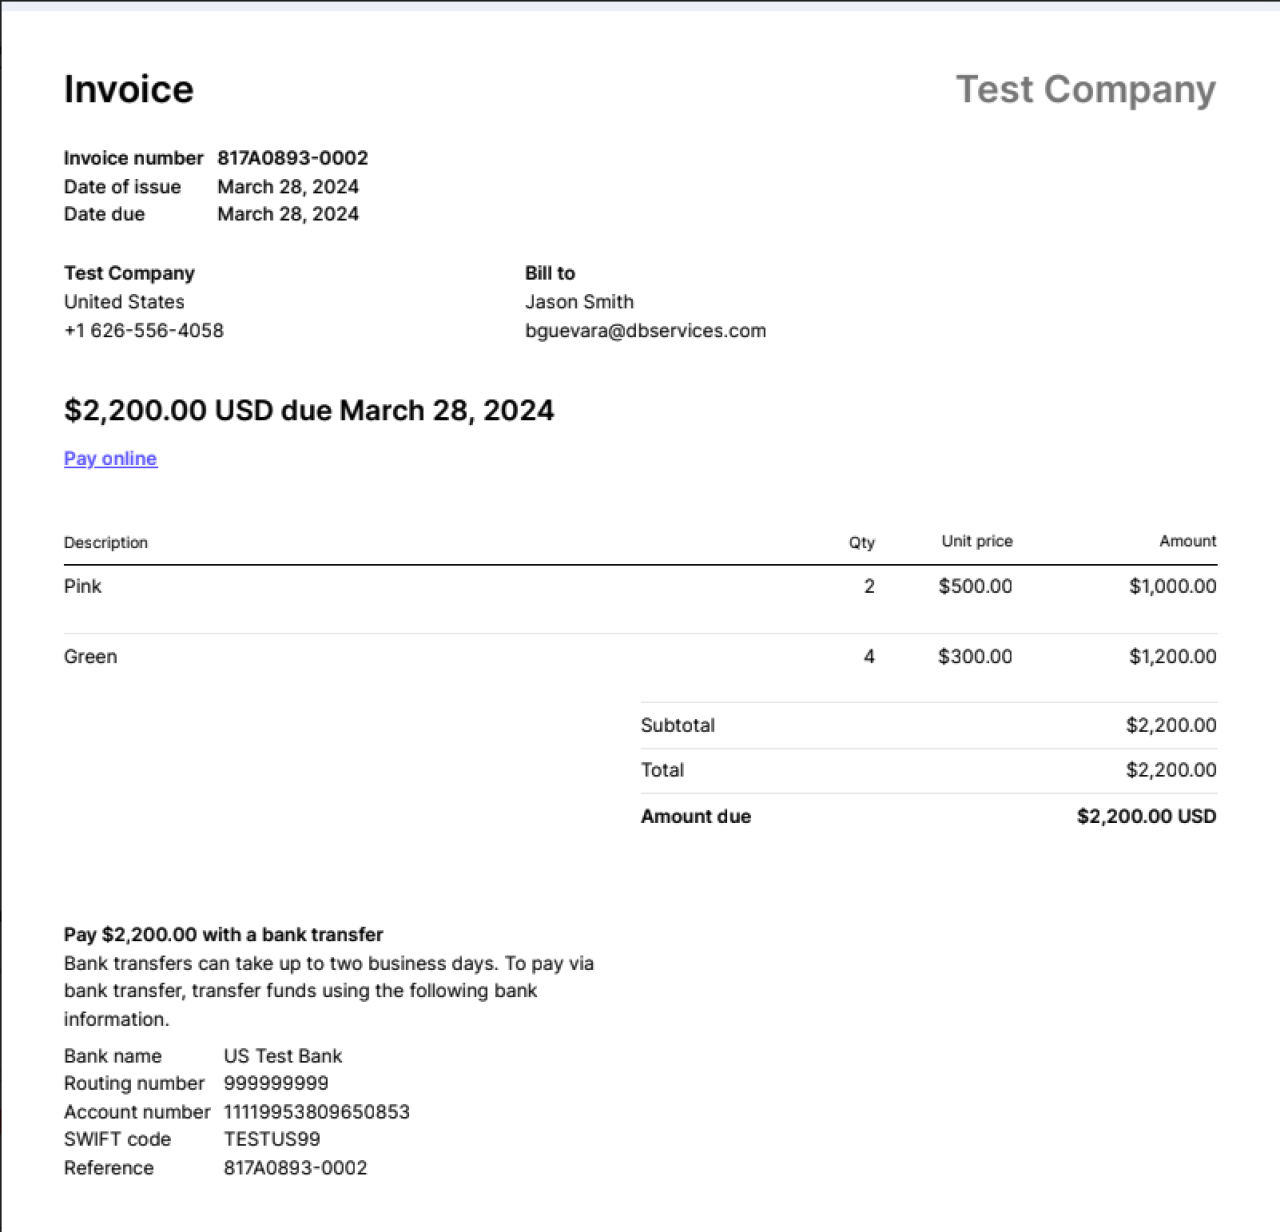
A PDF of the invoice will also be attached to the email.
FileMaker Technical Details
Now that we have seen what the application does, let's take a look at how it is done.
For the "CUSTOMER" and "PRODUCT" tables, the most important part is to have those IDs that you can obtain from Stripe. Without them, the records in FileMaker won't be connected to the records in Stripe. So make sure that those are set correctly.
The most important part of the application is in the script "Stripe - Create & Send Invoice" Let's review it in parts.
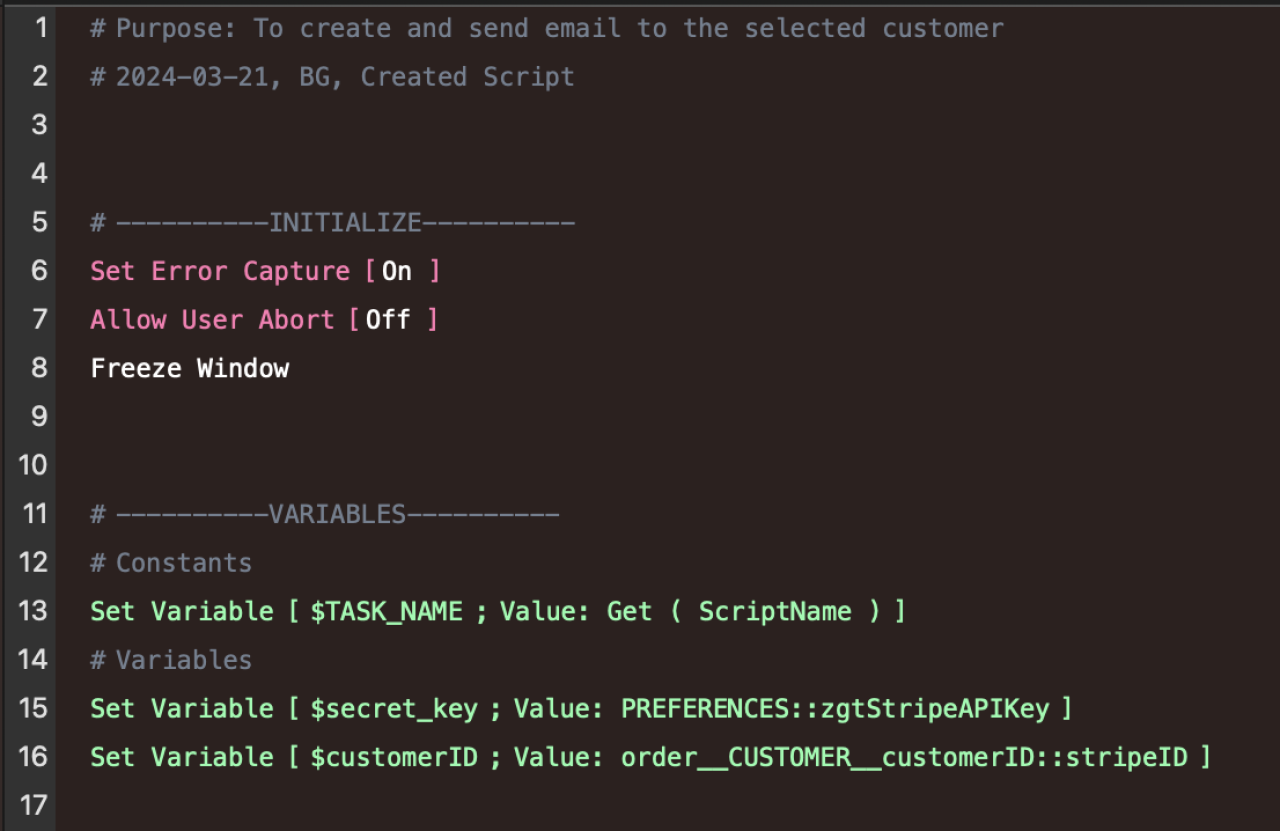
In the top section of the script, we are obtaining the key from the field in the preferences table and obtaining the customer ID from the Order record.
Next, we need to check to make sure that the order does not have an associated Stripe invoice already. If so, we just want to send the invoice rather than create a new one.
If an invoice is not created yet, we want to create a new one using the Stripe API. FileMaker gives us the ability to call REST APIs through the Insert from URL [...] script step.
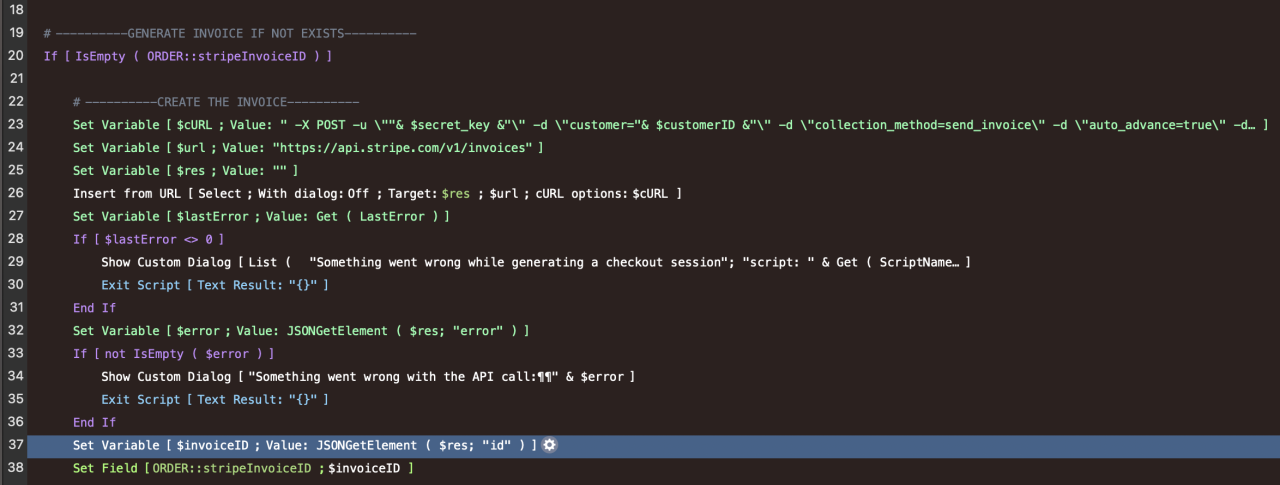
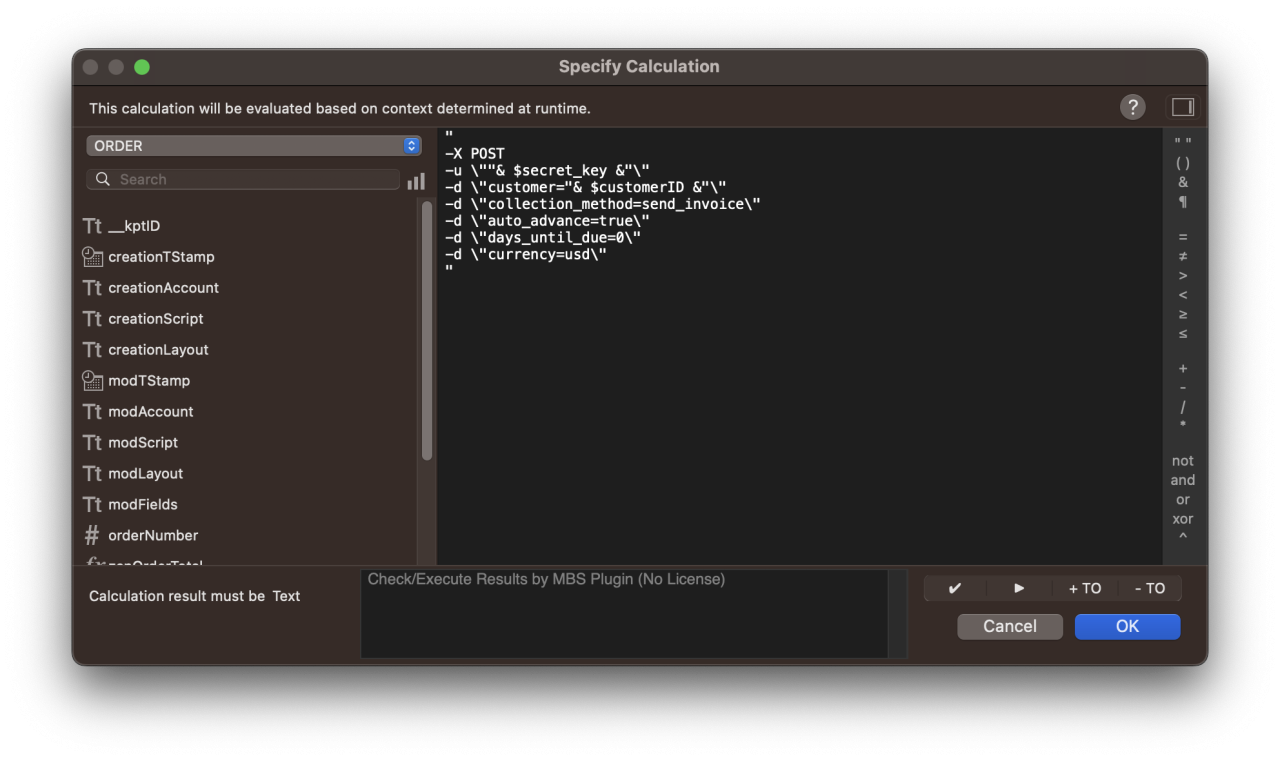
We can encode information in the URL and pass parameters to the HTTP request through cURL options. Here's a closer look at the cURL options used for this call:
Next, we can take a look at the second part of this if/else branch. After creating the invoice, we'll create the invoice line items using the information that we have in the current order record.
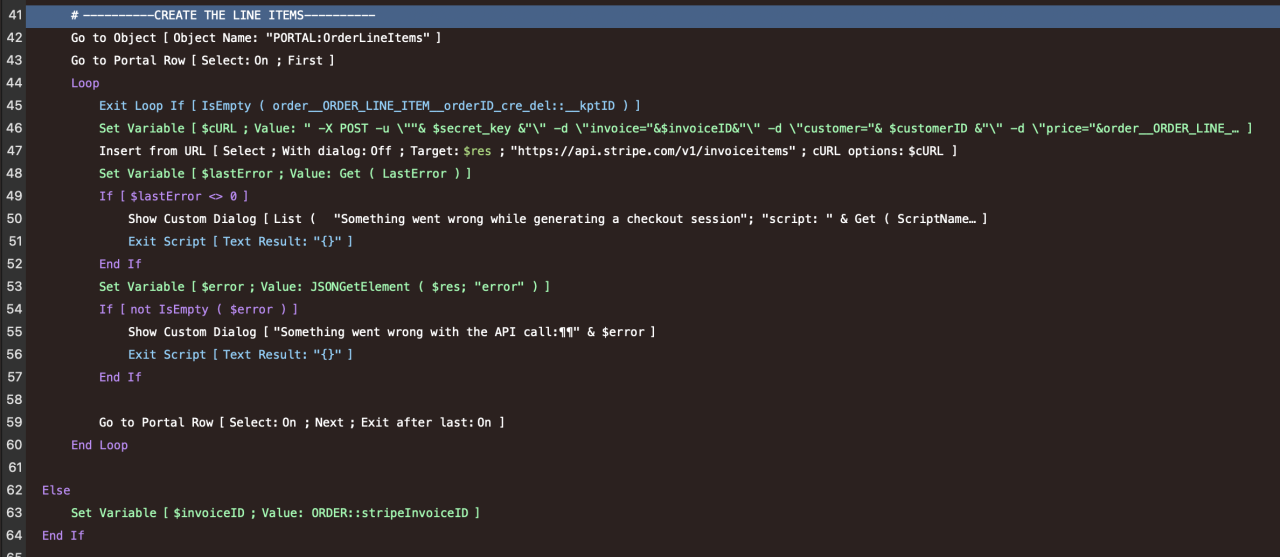
In the image above, you can also see the "Else" part of this branching. The "Else" case is really just getting the ID of the invoice if it has already been created.
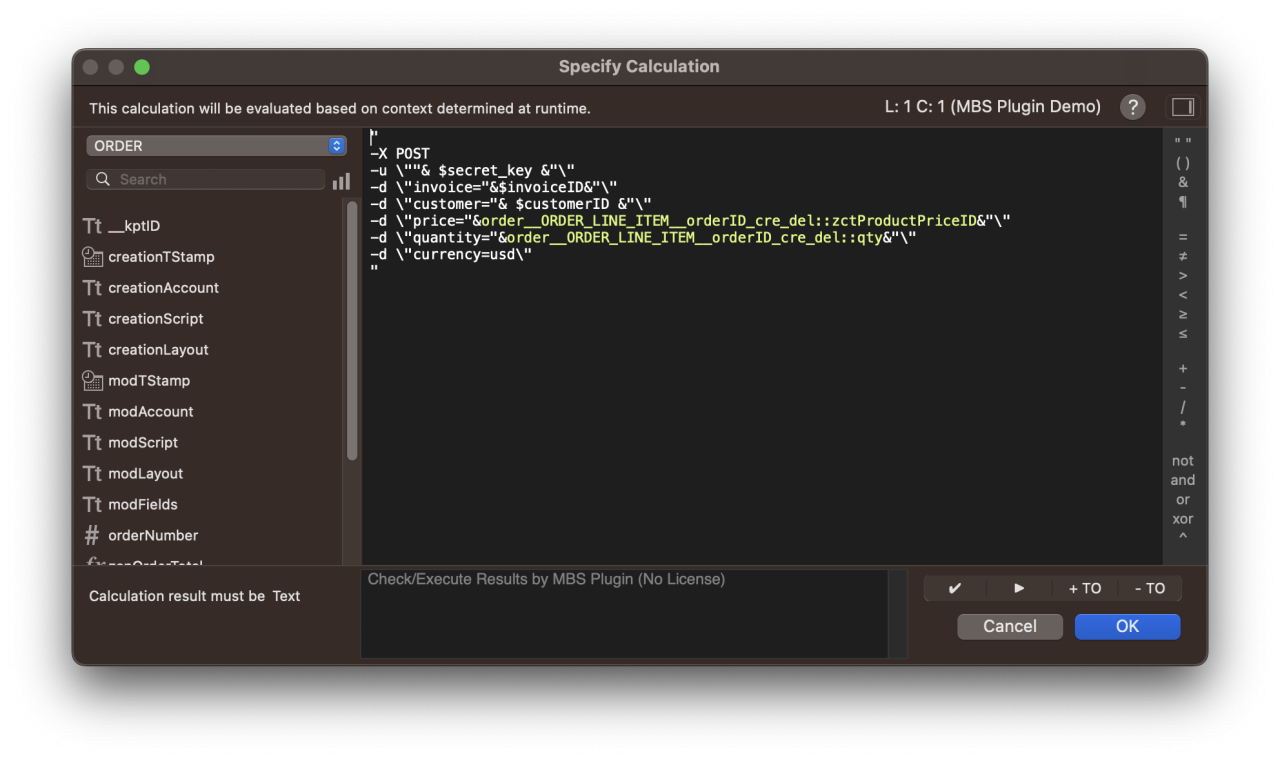
Here's a closer look at what the cURL options are for this specific request:
Towards the end of the script, you can see the last part where we simply send the invoice via email to the associated email address of the customer.
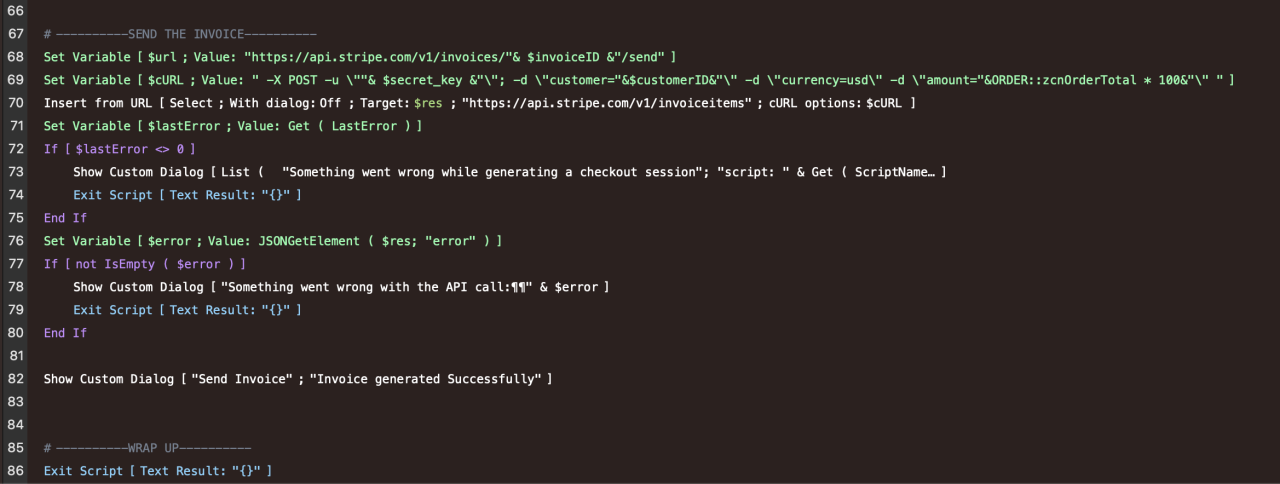
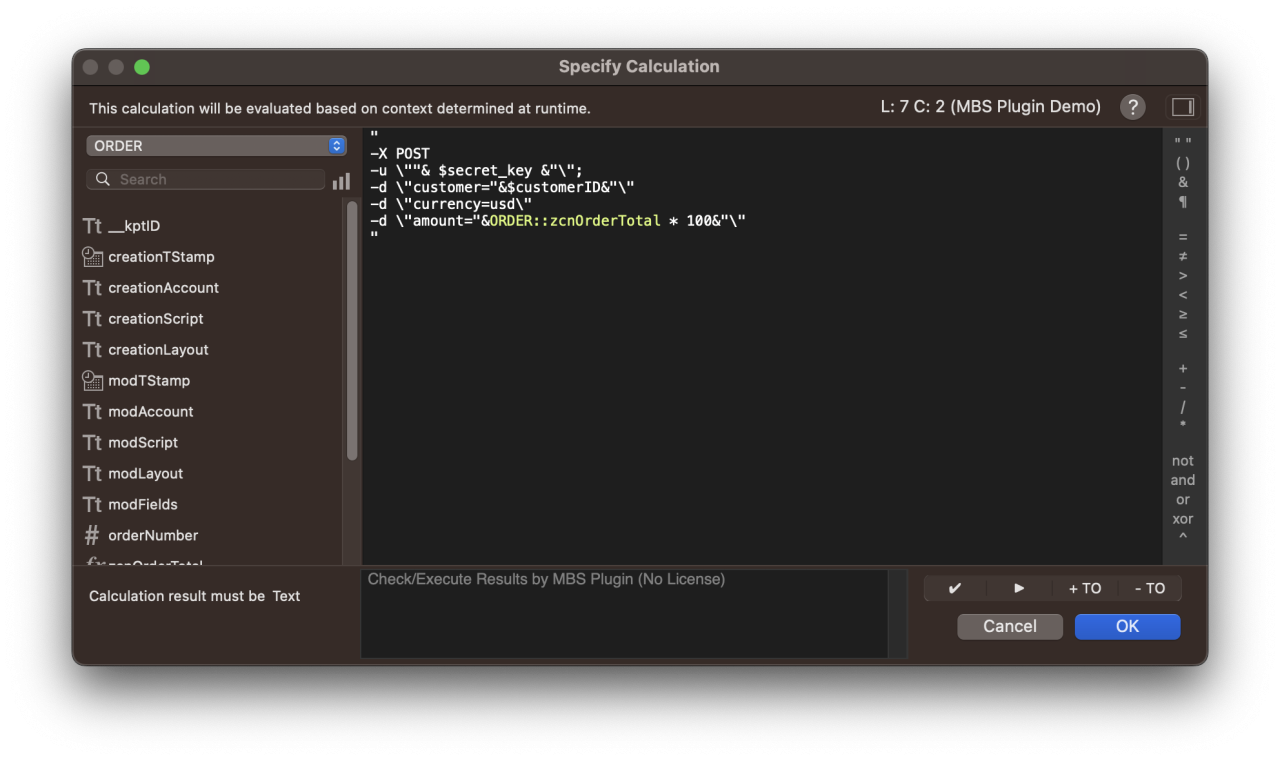
Here's a closer look at the cURL options needed for this part:
Conclusion
FileMaker provides very robust solutions for developing invoicing solutions. Integrating FileMaker with Stripe enables us to build powerful invoicing solutions for the web with a lot of flexibility in managing our products and customers. If you would like to start a Stripe integration in your FileMaker application, contact us and we'll be happy to help you build powerful invoicing solutions.
Did you know we are an authorized reseller for Claris FileMaker Licensing?
Contact us to discuss upgrading your Claris FileMaker software.
Download the FileMaker Stripe Invoices Integration File
Please complete the form below to download your FREE FileMaker file.


