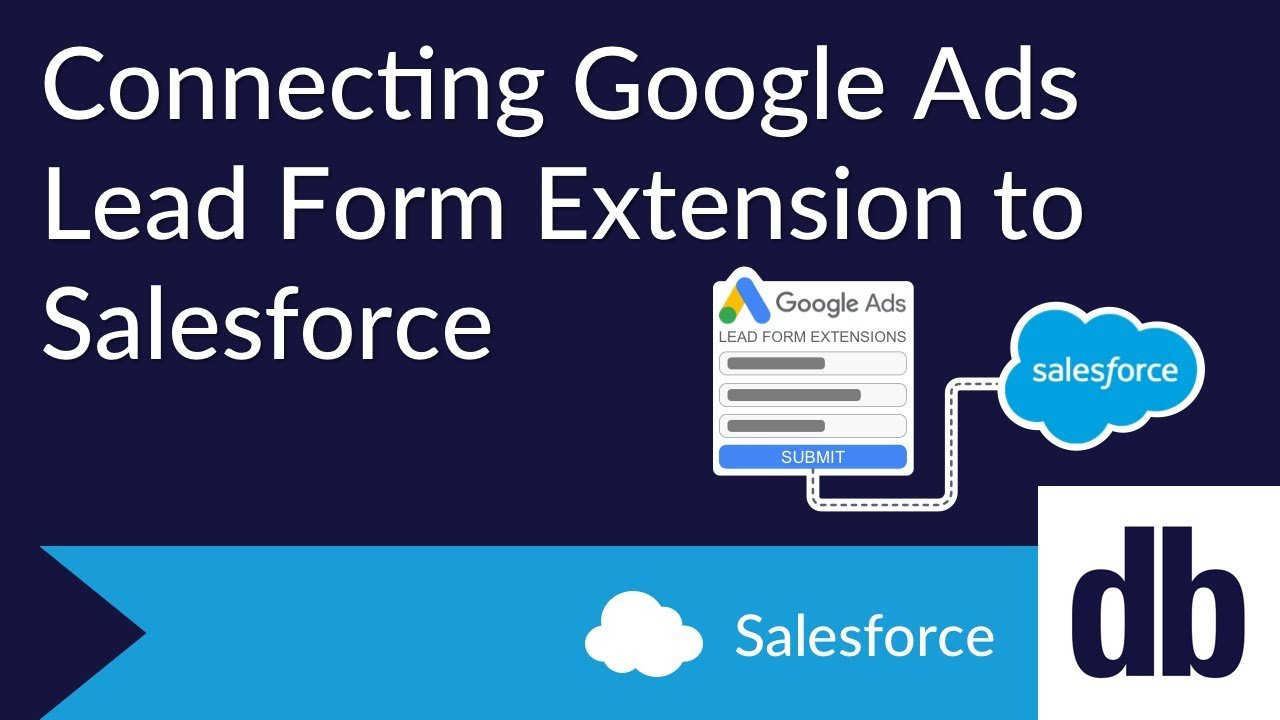
Lead Form extensions are one of the newest extension types Google Ads has introduced. These extensions allow you to capture leads when people submit a lead form directly on your ad. You have the option to download your leads in a CSV file or create a webhook integration to receive them directly in your CRM. Today, we'll walk through a step-by-step guide on how to create a custom webhook to capture those leads in Salesforce.
Setting Up Your Salesforce Org
Before establishing your webhook, you need to set up just a few things in Salesforce. You’ll create a custom metadata type, a new site, and a custom object that can log any errors thrown from your webhook.
Create a Custom Metadata Type
Using a custom metadata type to store relevant information for your webhook rather than hardcoding this information in Apex allows for an easier way to update the webhook key and optional email. You can name this anything you’d like. For simplicity, we named our Google Leads Webhook Settings. This will hold your Google lead form secret and, if you want to send an email notification upon the creation of the lead, an email address.
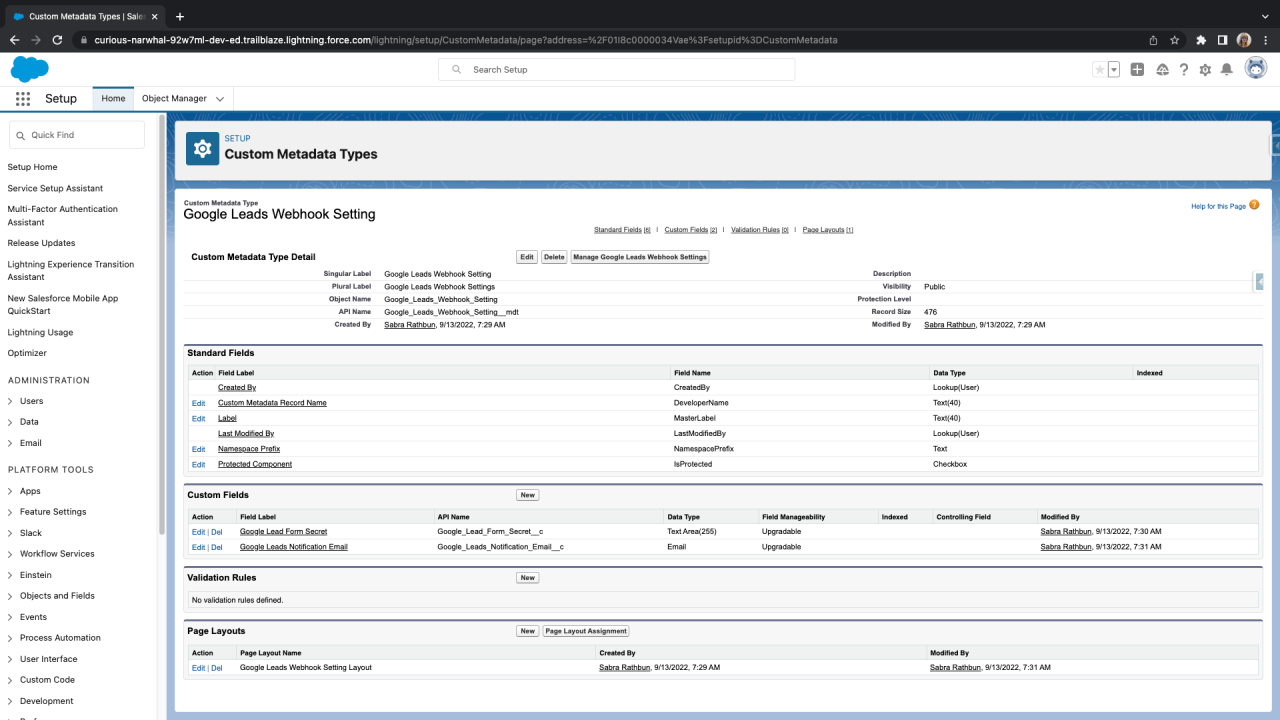
After creating the custom metadata type, you will create a record for it. Our record is labeled “Default Settings,” which we will query for and reference in our Apex class. The record will store your Google lead key, which you’ll create via any random key generator you choose, and the email address you would like the notification sent to if you choose to send one.

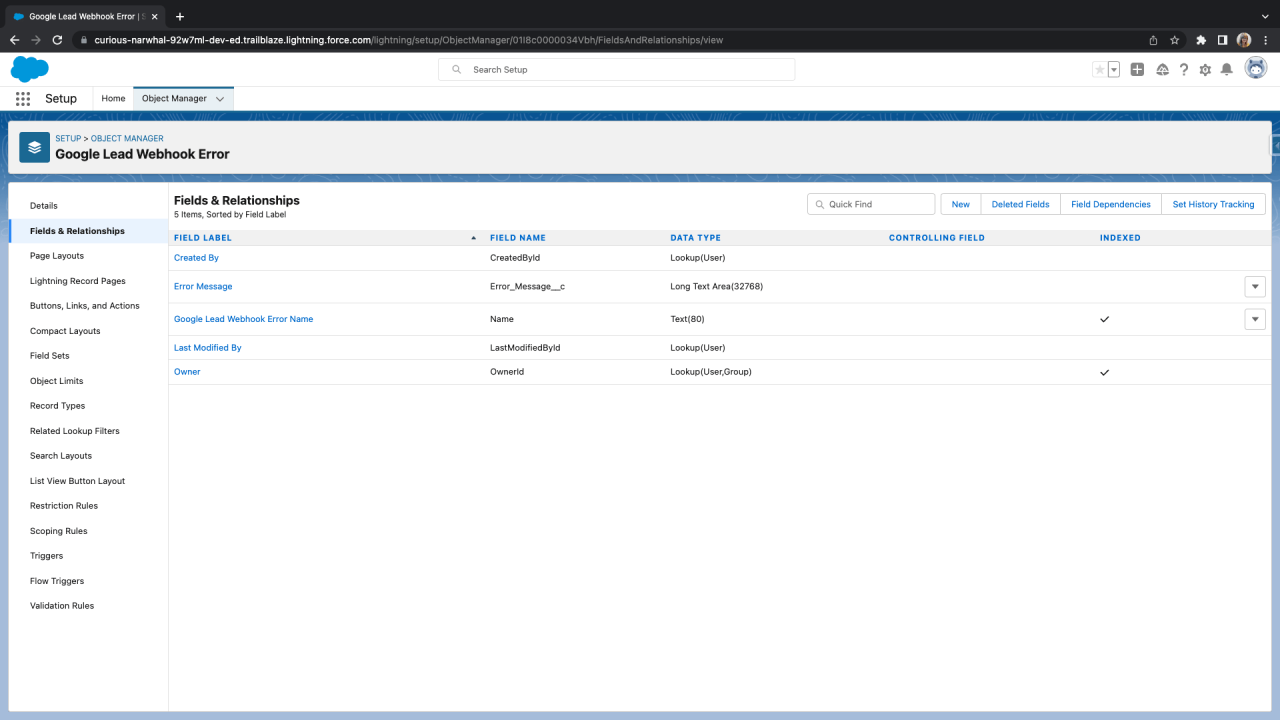
Custom Object for Error Logging
In order to log any errors you may experience when using your Webhook, you will want to create a custom object to log those errors. For this example, the error logging object’s name is “Google Lead Webhook Error.” You will create one custom text field that will be used to store the error message received. After creating this object, you are ready to set up your Apex controller.
Apex Controller for Your Webhook
Now that your org is set up, you’ll need to create an Apex class that will create a lead and, optionally, send an email notification.
Create a class that uses Rest Resource that has a URL map to the Lead object.
@RestResource(urlMapping='/Lead/*')
global with sharing class googleLeadsWebhook {}
Next, you will create an httpPost method to retrieve the lead information sent to your Google Ads Lead Form.
@HttpPost
    global static void handleNotification() {
       String requestBody = RestContext.request.requestBody.toString();
    }
Inside of this method, you will grab the body from the request and parse through the body's data. After parsing through the data and performing some error handling, you'll create a new Lead record, populate the information with the lead information in the request body, and insert the new record into your org.
Optional: Send a New Lead Email Notification
If you want to receive an email notification every time there is a new lead form submission, you'll need to create an additional method to do so. You'll perform a query on your custom metadata type record to grab your notification email address. From there, you'll populate the necessary information to send an email through Apex using the Messaging class. The Messaging class allows you to set the "Reply to" email address, which allows you to reply directly to the person who submitted the lead form. You can add any lead data, such as the lead's name, phone number, description, etc., into the body of the email. After customizing the email, your work in Apex is finished, and you're ready to create the custom website.
Custom Site
Your custom site will bridge the gap between your Google Ads account and Salesforce. After labeling and naming your site, set it up with the settings displayed in the image below.
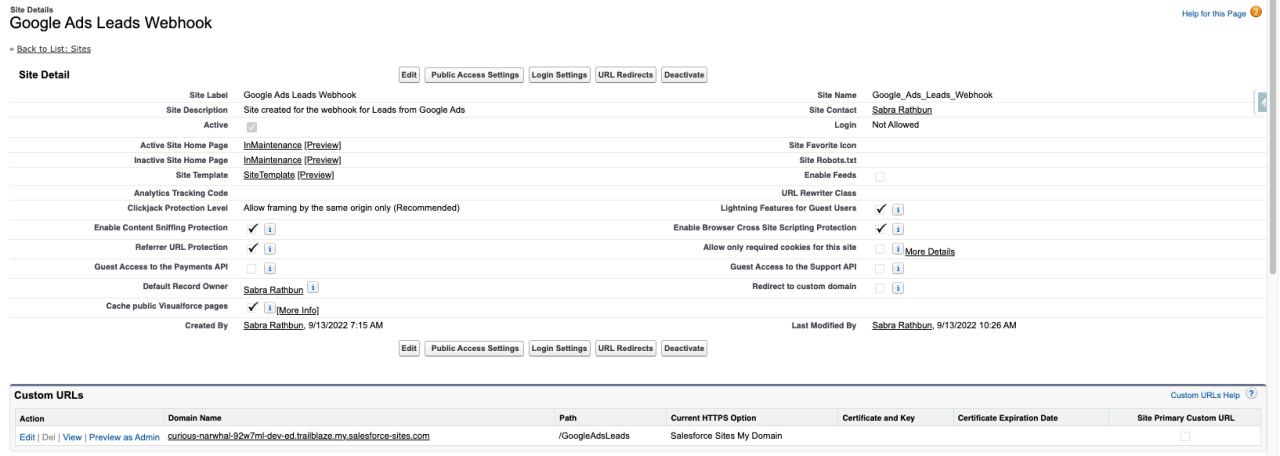
Save and activate your new site and copy the Site URL to use later on when setting up your webhook in Google Ads.
After saving, select the "Public Access Settings" button. This will take you to the profile created for this site. Give this profile access to your Apex class. If you're sending a notification email, give the profile access to send emails.
Setting Up A Google Lead Form Extension
In the Ads & Extensions section of Google Ads, go to Extensions. Click the + button to add a new extension and select Lead Form Extension. You can add the extension to your entire account or just a campaign. Select Create New and fill out the desired fields. Note: You will need a URL that links to your company's Privacy Policy to create a lead form extension.
Saving Your Webhook and Key on the Google Lead Form
At the bottom of the lead form you just created, there is a section labeled “Export leads from Google Ads.” Under “Other data integration options” you will insert your Site URL from the site you created in Salesforce into the webhook URL section and insert your key that is saved in your custom metadata type.
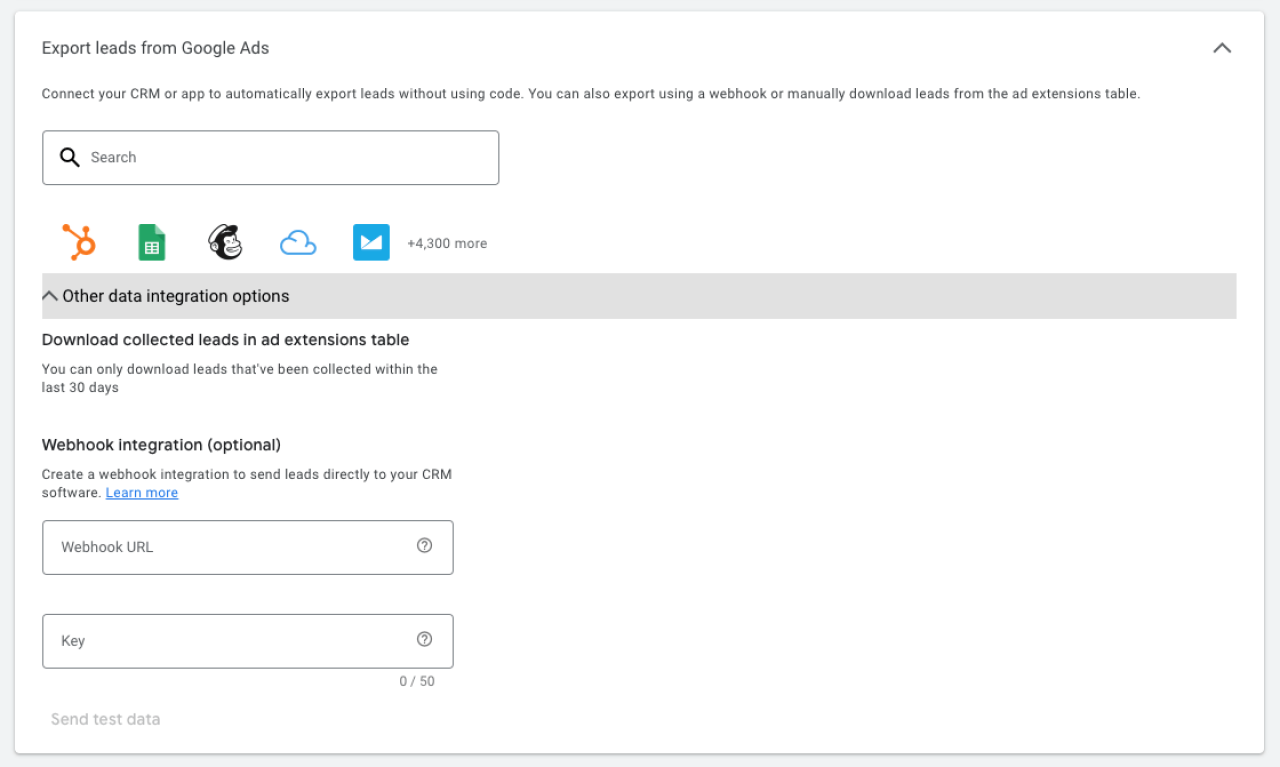
After inserting those, you will select “Send test data” at the bottom, and you will either receive a success message or a failure message. After receiving your success message, a new test lead should be generated in your Salesforce org and your optional notification email should be sent.
Conclusion
Google Lead Form Extensions are a quick and easy way to obtain leads directly from your ad. With a little help from Apex and a webhook, you'll be automating lead creation in no time. Need help with a Google Ads Salesforce integration? Contact us at DB Services and let's talk about what we can accomplish together!
Need help with your Salesforce digital transformation? Contact us today to discuss Salesforce consulting, implementation, development, and support!