Extracting the data you require from your application should be simple: that’s why we’ve designed an easy-to-use custom export wizard. The export wizard can be easily integrated into any web application using JavaScript, Tailwind, and the XLSX library and can be adapted to your organization’s unique needs.

Why use a custom export wizard?
Most of the web applications we work with utilize Amazon DynamoDB, which offers you a built in option to export data. So why even go through the effort of creating a custom export wizard?
One limitation with the default export option provided in DynamoDB is that you cannot specify what fields you want returned in your export, so your export will include all fields declared in the database. Another limitation is that the only file type supported for export is CSV. With our custom export wizard, you can specify the exact fields you want to export and build it to support different file types, such as XLXS.

Utilizing the Custom Export Wizard
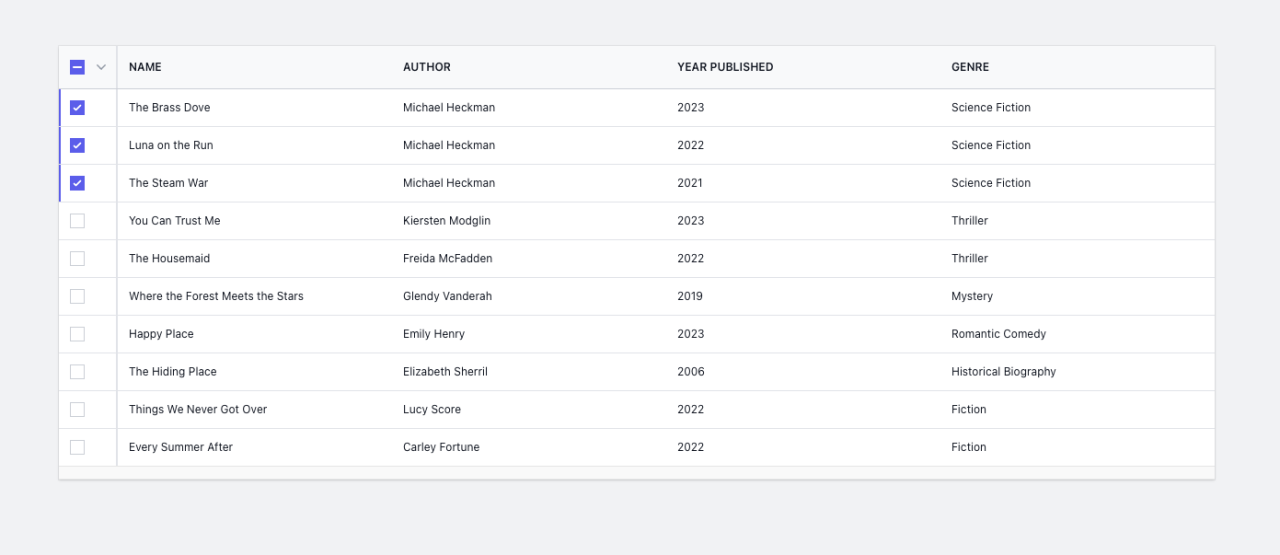
Using the export wizard is intuitive and allows the user to easily select the exact fields they need to export. We’ve set up a default export process with a customized user interface that can be tailored to your organization. We’ll start by first selecting a few records to export.
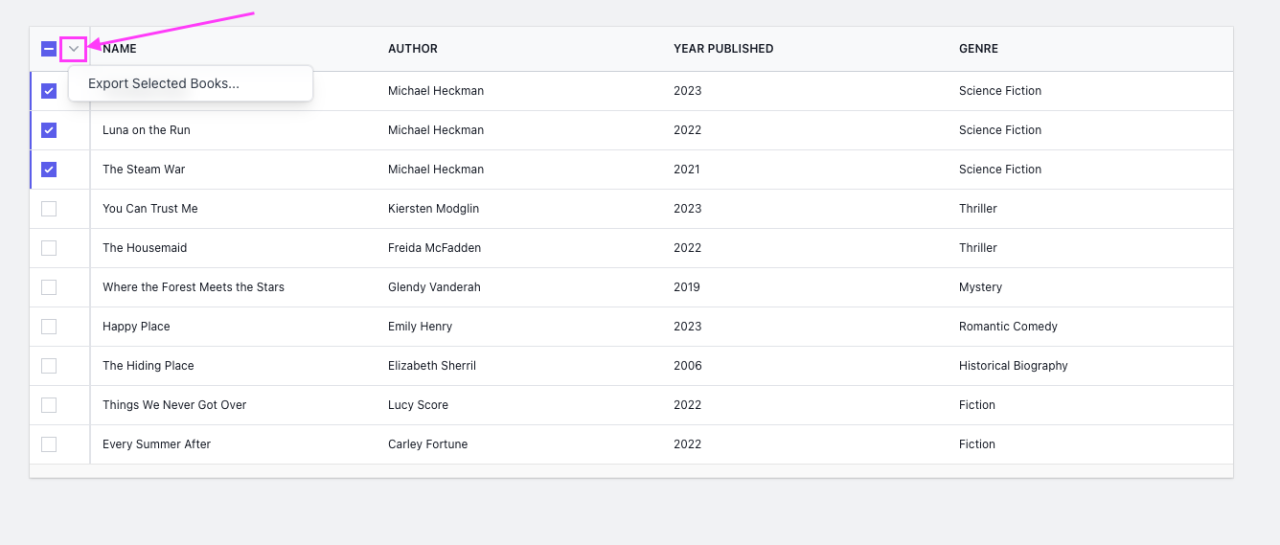
Next, we’ll need to start the export process.
Our custom export wizard will now appear. You’ll notice a list of fields available for export on the left. The fields available for export are determined based on what table or set of data the user is trying to export. We’ll go ahead and select just a couple of the available fields for our export.
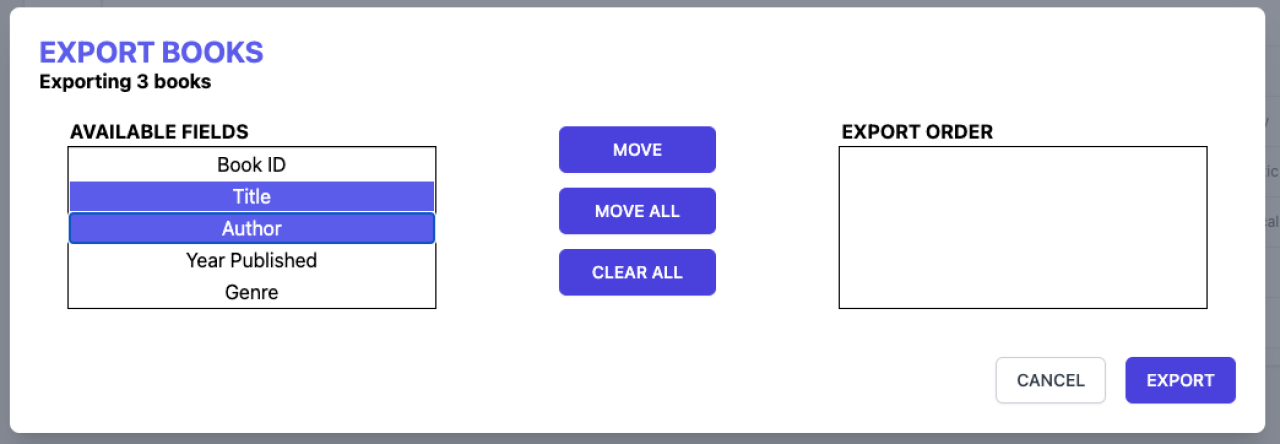
In the middle of the export wizard, we have three action buttons.
Move will move the select fields from the available fields column on the left to the export order column on the right.
Move all will select all available fields and move them to the export order column.
Clear all will do the opposite and will clear all fields in the export order column.
Let’s go ahead and move over the selected fields for our export. Now’s the time to organize the data for the export. The fields will appear in the order specified in the export order column.

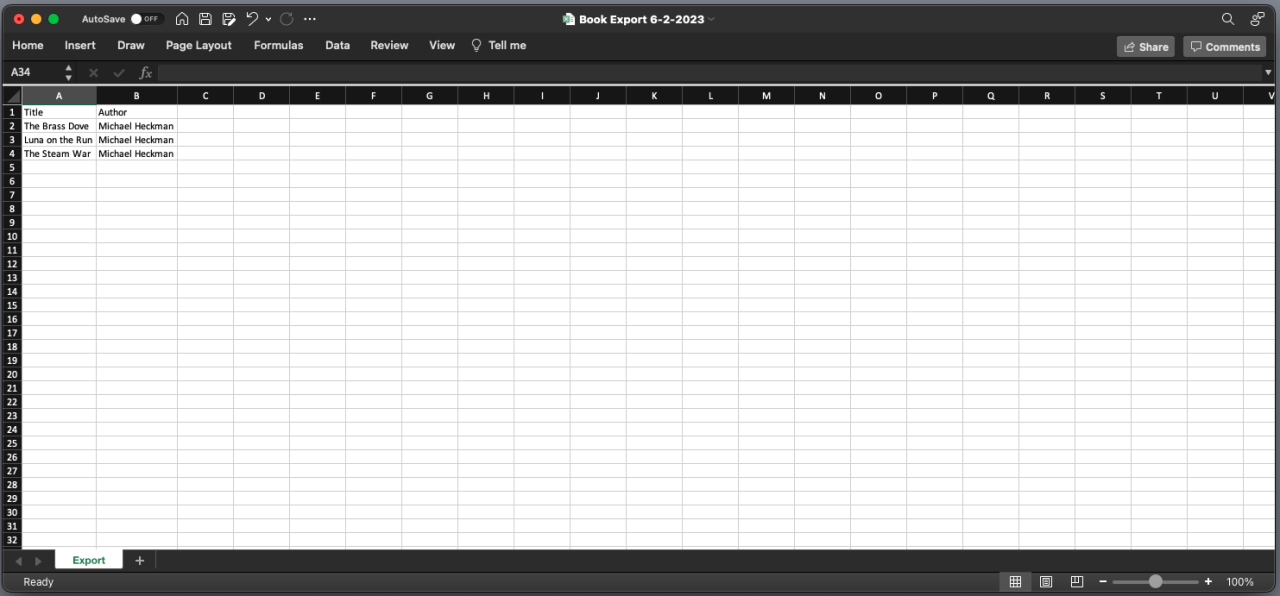
The last thing left to do is create our export by hitting the export button. You will see your export file as a download in your browser.
Using the Download File
In order to use the download file, you will need an integrated development environment such as Visual Studio Code. You will also need to have Node.js installed on your computer. Open the download file in your IDE and open a new terminal window in that filepath. Run the command ‘npm install’ to download package dependencies, then run the command ‘npm run serve’ to run the application locally. Click on the localhost link to open the application in your browser. If for some reason you experience any issues trying to run the npm commands, follow the instructions detailed in the terminal.
Conclusion
Save time and be more efficient by grabbing only the necessary data you need without any hassle. If you have any questions or wish to discuss integrating a custom export wizard into your web application, please contact DB Services.
Did you know we are an authorized reseller for Claris FileMaker Licensing?
Contact us to discuss upgrading your Claris FileMaker software.
Download the Custom Export Wizard
Please complete the form below to download your FREE file.


