It’s best practice to work on a sandbox version of a FileMaker database, but historically the FileMaker platform did not offer an out-of-the-box tool to migrate data from a live solution to a new version. This means that developers were encouraged to work on live files or build custom migration scripts; both of these options increase costs, cause significant downtime for maintenance, and disrupted live users. Fortunately, FileMaker now offers a data migration tool that migrates data from one file to another with speeds around 10x faster than a custom script. To make this process easier, we have created a companion file (download link below) that allows you to run automatically run data migrations for multi-file solutions.
Basic Requirements
A FileMaker Developer Subscription is required to download the data migration tool.
Once the tool is downloaded, you will need two more things: an .fmp12 file with the data you want to transfer (the source file), and a clone of the .fmp12 file you want to transfer that data to (the clone file). Once you have those, you need to make sure the following conditions are met:
The cloned file doesn’t have any records in it.
All the files involved are closed.
You have local access to the files with full access accounts and encryption passwords (if applicable).
Creating the Command
With the basic requirements in place, you can begin creating the command that migrates the data. The syntax, taken from FileMaker’s official documentation, is as follows:
FMDataMigration 17.0.1 (xx-xx-2018)
Description: Migrates all record data from a source FileMaker Pro file to a copy of a clone file.
Usage: FMDataMigration -src_path <path> -clone_path <path> [<other options>]
-src_path <source file path>
-src_account <source Full Access account> (default is Admin)
-src_pwd <source Full Access password> (default is blank)
-src_key <source decryption key>
-clone_path <clone file path>
-clone_account <target Full Access account> (default is Admin)
-clone_pwd <target Full Access password> (default is blank)
-clone_key <target decryption key>
-target_path <target file path> (default is source path with " migrated" added)
-v (verbose mode)
-q (quiet mode)
When actually creating your command, you will want to put all of the parameters on the same line. So it will actually look more like this:
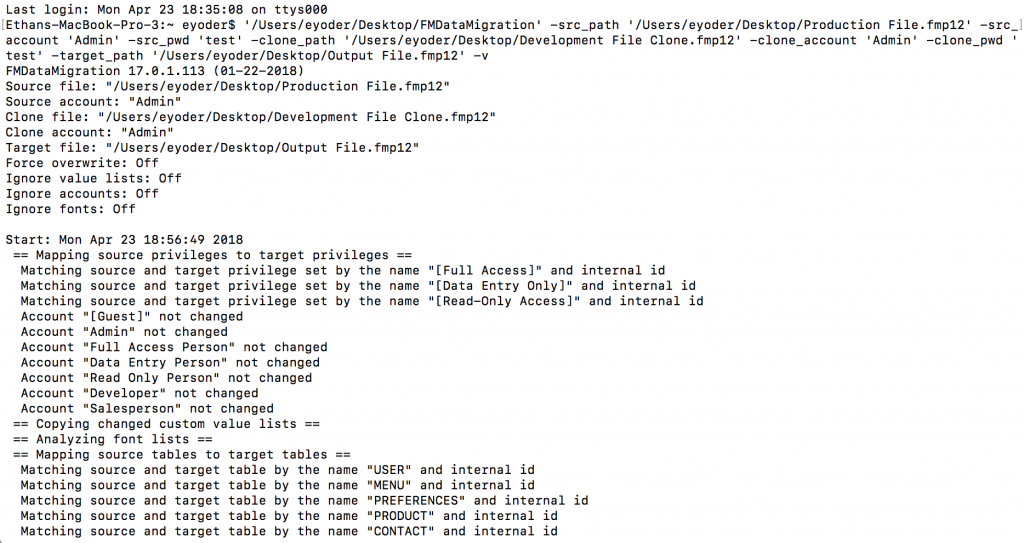
'/Users/username/Desktop/Data Migration Tool/FMDataMigration' -src_path
'/Users/username/Desktop/Data Migration Tool/Source File.fmp12' -src_account 'Admin' -src_pwd 'password'
-src_key 'decript_key' -clone_path '/Users/username/Desktop/Data Migration Tool/Data File.fmp12'
-clone_account 'Admin' -clone_pwd 'password' -clone_key 'decript_key' -target_path
'/Users/username/Desktop/File With Migrated Data.fmp12' –v
Once your command is created, paste it in either Terminal (Mac) or Command Prompt (Windows), and press enter.
A few notes about parameter values:
If you decide to specify a target path, it must be different than the source and clone paths.
If a file already exists at the specified target path, the data migration tool will stop you from executing the command.
Verbose mode will display all information about the data transfer and in the command module, and quiet mode will display nothing.
If you don't want to type all of this information out in a command prompt, you can use our companion file (download link below). Using the companion file, you can easily run a data migration for multi-file solutions.
What Transfers Over
After you successfully run the migration, a new file will be created. The new file will have the schema of the clone, and the data from the data file. The data carried over from the data file will be the:
FileMaker accounts
Records
Next serial numbers
Indexes
Internal Record IDs, aka Get( RecordID ) for each record will be transferred over
Custom value lists that have been modified
All other information (privilege sets, layouts, table occurrences, etc.) will be inherited from the clone. Furthermore, only modified value lists with custom values will be transferred into the new file from the data file. Value lists not in the clone will not be created in the new file, and value lists using table occurrences will be inherited from the clone.
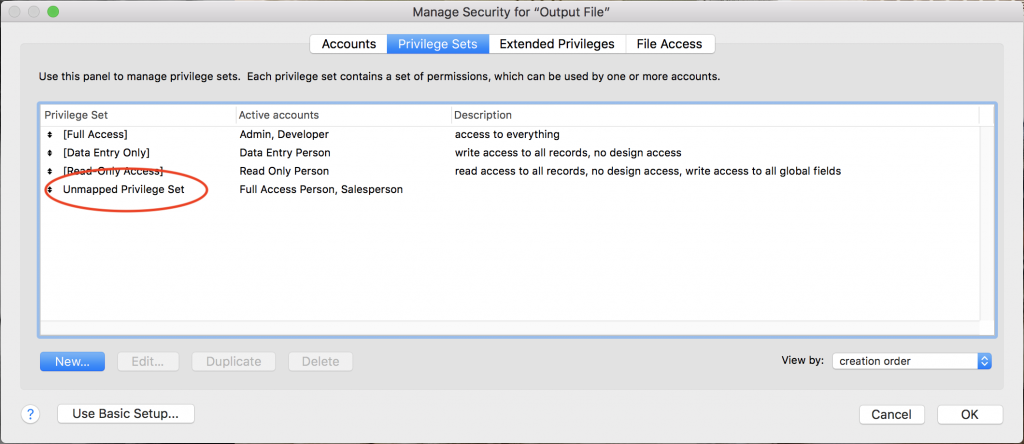
While FileMaker accounts transfer over, privilege sets do not. Any accounts that are given a privilege set not in the clone will be given an empty privilege set called “Unmapped Privilege Set”.
If you create fields, tables, or table occurrences in the source database after making the clone, these will not be created in the new file. Any data in these fields will not be transferred over. Also, using the data migration tool does not fire auto-enters.
Field Mapping
When transferring the data over to the new file, the data migration tool will try to map the fields by name first, then by FileMaker’s internal ID. This means that if you change the name of a field in the source file after making the clone, it will still map those two fields together. However, if you change the name of a field, then create a new field and give it the old name of the first field, the data will be transferred to the new field instead of the first field.
Conclusion
FileMaker’s data migration tool is the easiest and quickest way to transfer data from a live database to an updated version. Utilizing this tool correctly can save both time, money, and the headache that can come with live development. Feel free to contact us if you need any further assistance or if you would like to discuss getting your data transferred.
Did you know we are an authorized reseller for Claris FileMaker Licensing?
Contact us to discuss upgrading your Claris FileMaker software.
Download the FM Data Migration Companion File
Please complete the form below to download your FREE FileMaker file.
