Salesforce has built-in development environments called Sandboxes that we use to build and test your custom solutions. Follow the steps below to create a Developer Sandbox and give access to DB Services.
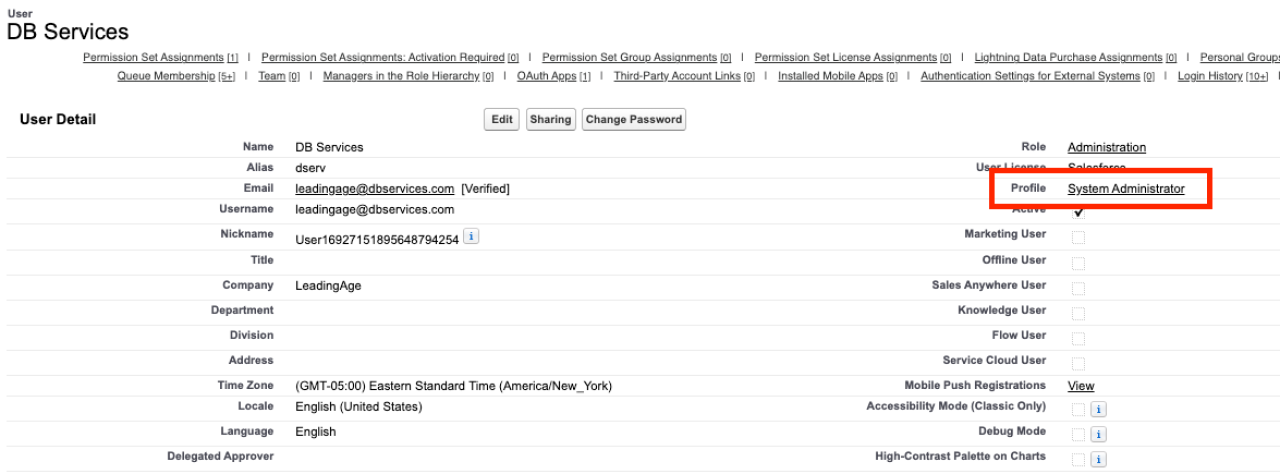
System Administrator
Before setting up a sandbox, be sure the user is a System Administrator. If they aren't sure, follow these steps:
Login to Salesforce and click the Account Icon in the top right.
Click on Settings.
Click on Advanced User Details
Verify the profile is System Administrator.
Setting up a Sandbox
1. From an admin’s user account, click on the gear icon next to your profile icon at the top right. Select Setup.
2. In the Quick Find box on the left, search for Sandboxes, and click Sandboxes.
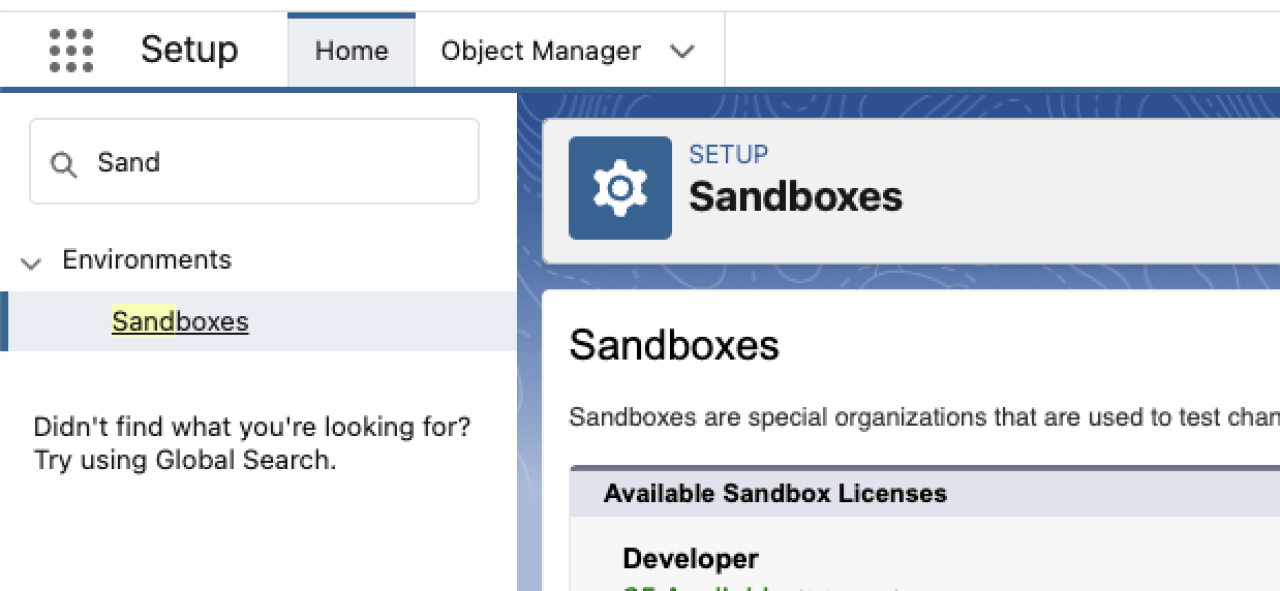
3. On this screen, you will see the number of sandboxes available for use.
4. In the middle of the screen, click New Sandbox.
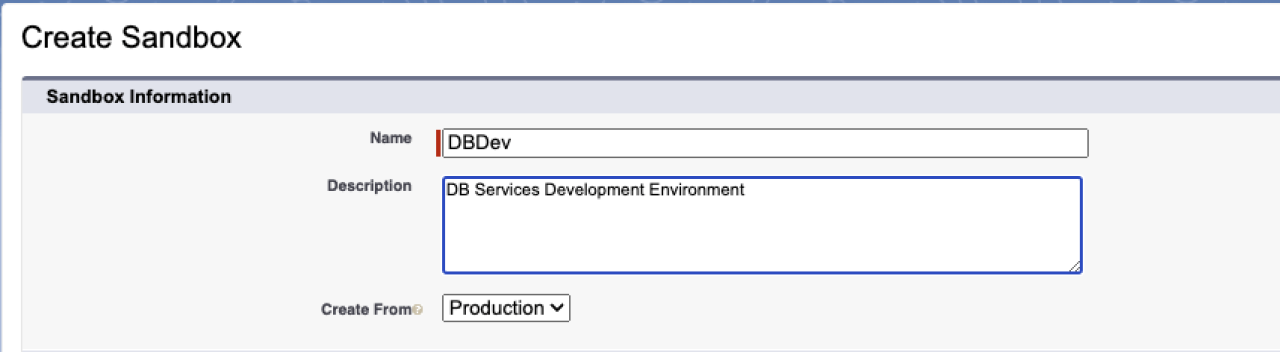
5. Name the sandbox DBDev, add the description DB Services Development Environment, and select Production from the Create From dropdown if it isn’t already selected.
6. Click Next at the bottom of the Developer’s Sandbox column.
7. On the next screen, leave Apex Class blank and click Create.
Creating A DB Services User
Login to Salesforce using a System Administrators Account.
Click on the gear in the top right and click Setup
In the Quick Find box on the left, search for Sandboxes, and select Sandboxes.
Find the entry for the Sandbox you created above. Click Login next to the name of the sandbox.
Use your regular Salesforce password to login.
Click on the gear in the top right and click on Setup
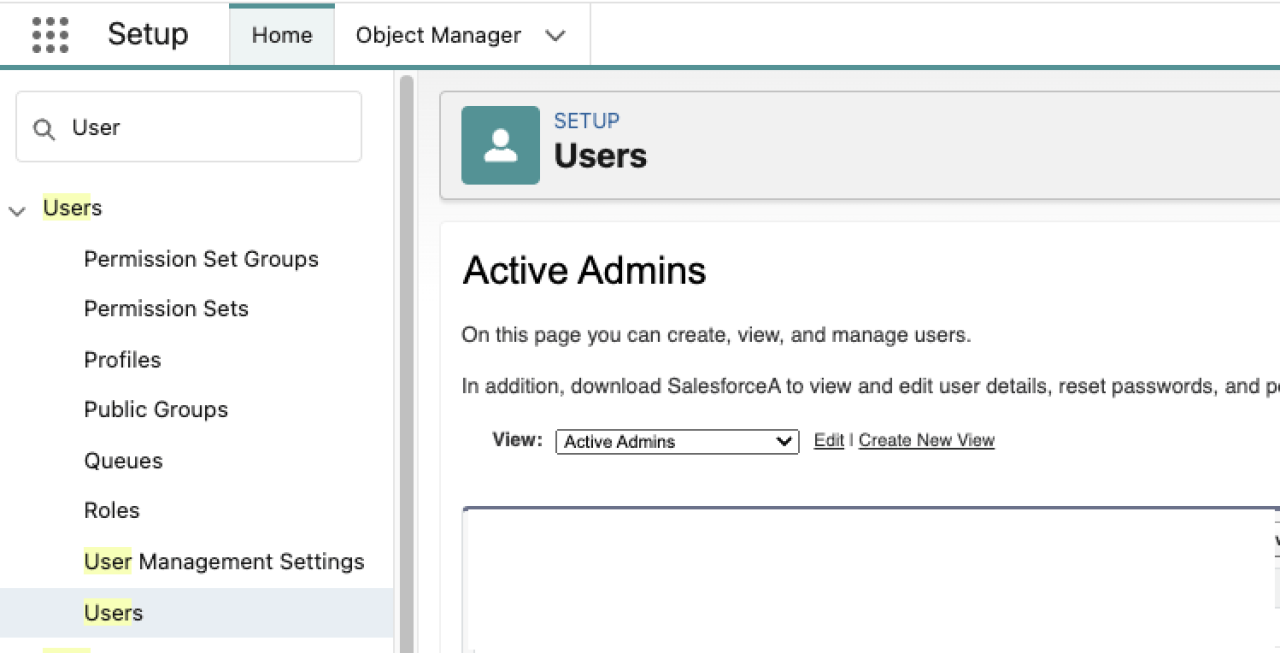
In the Quick Find box on the left, search for Users, click Users.
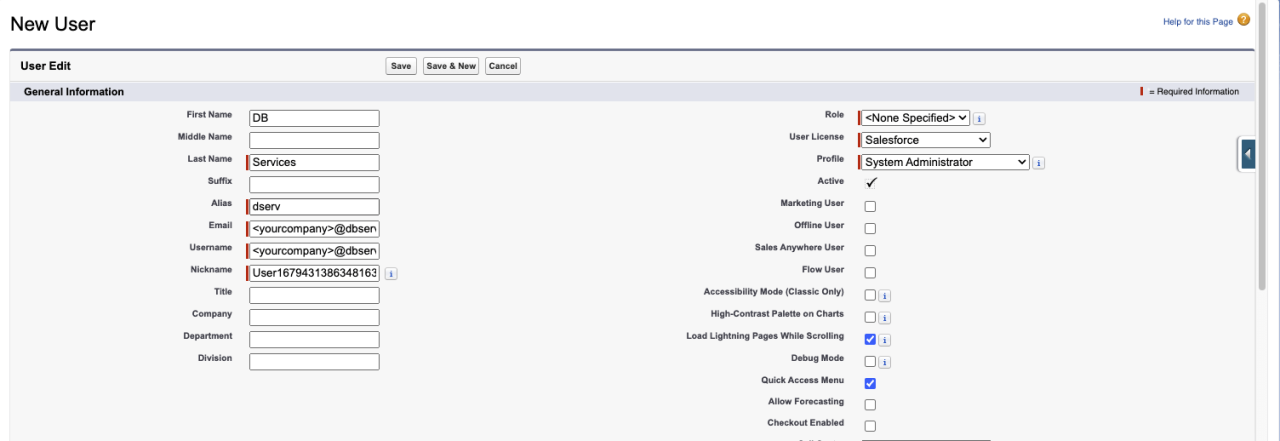
Click New User in the middle of the page.
Fill in the following information:
First Name: DB
Last Name: Services
Alias: autocomplete
Email: Please use the email we provided you, or if none, salesforce@dbservices.com
Username, Nickname will autocomplete.
User License: Salesforce
If you do not have a user license available, please contact us to continue this setup process.
Profile: System Administrator
Active: Checked
At the bottom of the screen, ensure that Generate new password and notify user immediately is checked.
Click Save.
Salesforce will send a confirmation email to the email you provided above. Once we receive that email, we will log in and confirm that we can access the sandbox.
If you have any questions or concerns, please reach out to us at support@dbservices.com.